Showing posts with label chocolate. Show all posts

Sunday, September 19, 2010

Learning to Work with Chocolate

This year for my birthday I decided to do something special for myself - to take a class in chocolate-making! I think the term "chocolate making" is a little deceptive. If you are in the chocolate industry to 'make' chocolate is to take it from the plant, extract the bean, roast, pulverize and blend. However, in this class we took already 'made' chocolate and coaxed it into the more traditional forms of truffles and mendiants. I actually took a vacation day from work to take this all-day class: 6 hours of stirring, marbling, piping, dipping and tasting chocolate from cocoa butter to 80%.

In other words - it was a truly magical day.

I feel like I learned so much - not only about HOW to make chocolate but the science and sense of making chocolate. We spent a significant amount of time smelling different 'scents' found in chocolate and tasting different kinds of chocolate (single origin and blended) and that process made me appreciate the quality chocolate I have had the pleasure of eating in the past. And how complex! Wow, how complex... I really had no idea chocolate had so many subtle layers, tones and notes. Kind of like coffee - I suppose. It was amazing how the ORIGIN of the bean would affect the flavor of the coffee! My favourite? Peruvian and Ecuadorian - the ones we tried had more distinct floral and sweet flavour, even though both were equally 'dark' chocolate.

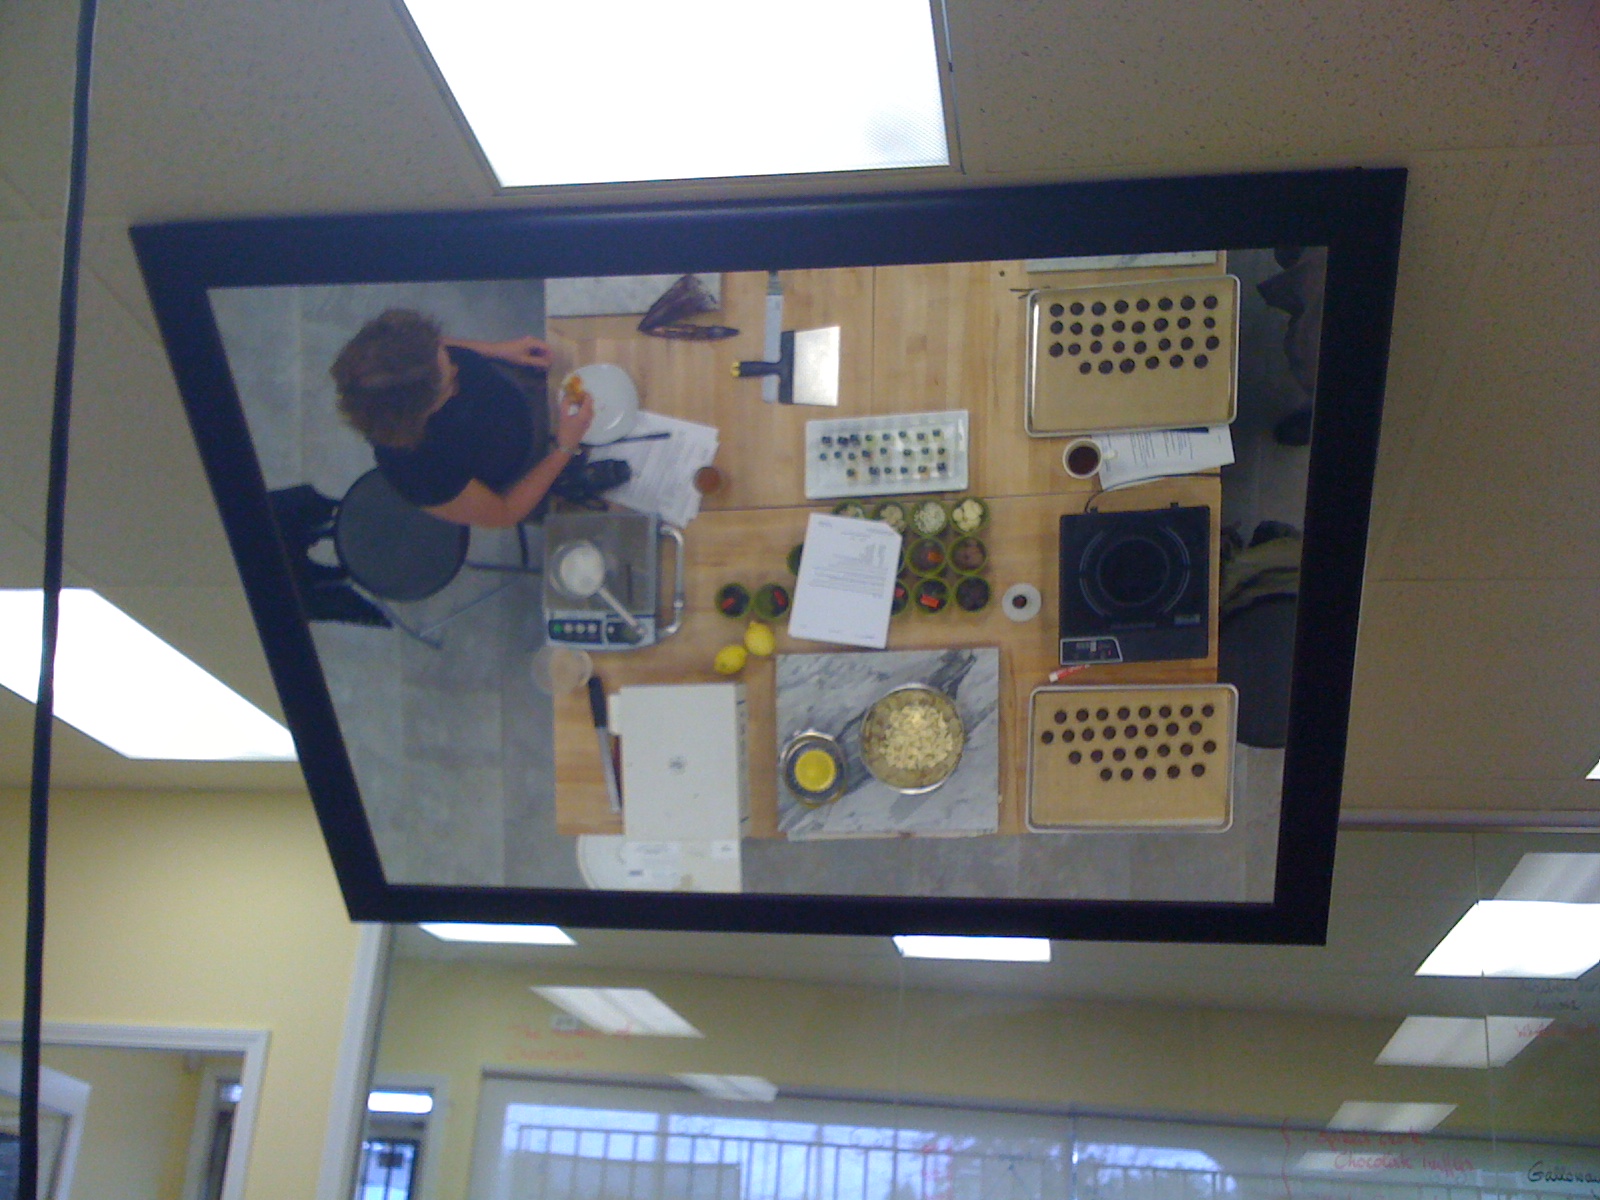
 A picture of the mirror above chef Marco. If you can see those green ramekins in the reflection, we got to taste ALL of those chocolates! Yes, we worked hard. Very hard.

A couple of snapshots of our work area. Under our Boos counter? Beautiful Kitchen Aid Pro 6s ready to be put into action! Yum! 
A chocolate 'tumbler' and a line of induction stovetops for heating up our saucepans to melt chocolate (a la double boiler) and also the heat up cream for the ganache. They worked SO well - I am almost tempted to shell out the dough for a stovetop. Seriously - the induction stovetop works with the magnetic element in cookware to heat up the vessel - so much of the residual heat is eliminated, as well as any messy scalded-on foodstuffs. It heated up the cream and water SO fast - I can see why they are used in candy making!
Chef Marco Ropke speaking to the troops and dispensing his wisdom! I have to say, if there was one major reason for me to take another class, it would be because of him. Chef Marco was professional, helpful, funny, and a terrific teacher - I highly recommend being under his tutelage!
(above) Marbled-whipped and piped dark chocolate ganache. These would later be dipped in tempered chocolate and rolled in cocoa powder. (below) Lime & coconut white chocolate ganache is piped into premade truffle shells (my god! no one told me these existed!). Unfortunately we didn't have time to finish them (closing off the top & another coat of white chocolate) but no matter - they were still delicious!

The bounty. Oh yeah.

I was blessed and cursed to be the odd person out in the 7-person class. I didn't have to work with a buddy which meant double the work - but double the goodies to take home! And take home I did! Two chocolates seen above, I did not document - the hazelnut nougatine and chocolate mendiants. The nougatine was divine - a whipped milk chocolate ganache with crunched up caramelized hazelnuts dipped in tempered dark chocolate and rolled in icing sugar. Amazing. The ganache was fluffy and soft and the caramelized nuts added a depth of texture and flavor that was mind-blowing. I will definitely be making those again! The dark chocolate mendiants are tempered chocolate piped into molds and topped with nuts and dried fruit. So simple, yet so delicious.

Two main things I learned:

1) Quality of chocolate COUNTS. One prime example of this are the chocolate mendiants. By themselves, they are a very simple confection. Tempered chocolates piped into molds and studded with fruits and nuts. But the usage of high grade dark chocolate works with the toppings to create a layered and lush experience that cannot be replicated with generic store-bought chocolate. The break of the chocolate is crisp - it doesn't melt into your hands and the flavour is savored not only with your tongue, but your nose and throat - the scent and texture of the chocolate create an experience that is unlike any other.

2) Making chocolate is damn hard. My biceps HURT the next day. Fold chocolate over and over on a marble slab is hard work. Stirring to melt chocolate is hard work. Whipping chocolate is hard work. Dipping and rolling chocolate is hard work. Making chocolate is hard work.

I would love to take more classes in the future - and luckily they are starting a batch of evening classes to accomodate those who work full-time - now to start saving up!

There is something to be said about actually taking a hands-on class like this. Yes, it is expensive; yes it is labour intensive - but there are tips & tricks conveyed here that you cannot get through a cookbook or TV show. We stuck our hands IN the chocolate (and yes, it was amazing) to feel the temperature of chocolate. We let pure cocoa butter crumble in our mouths. We watched our ganaches split (not mine, tee hee) and worked hard to bring them back to life again. These are the real lessons learned in the class - not just how to follow a recipe.

Thank you Marco & the Vancouver Pastry School!

Sunday, November 22, 2009

Another Sunday. Another cake. Mmmmm.


(ah, will I ever format my pictures again? Maybe one day. But they actually look really decent before I do all ma fancy edging. So perhaps for quality's sake, I'll keep them....'raw'. Maybe borders?)

I let Annie know that a cake was a comin' her way - what flavour would she like? "Chocolate..." is the response I received. "But what kind of chocolate?" I replied, "there's dark chocolate, milk chocolate, white chocolate, chocolate hazelnut, chocolate orange, chocolate with coconut...!!"

"Give me direction...!" I pleaded, "I'll give you until Monday to decide."

Monday came and went with no response. :( Luckily for me, the local grocery store would make my decision for me. 2 packets of raspberries for $5! Score! Get me 4, Mothership!

The goods:

Dense chocolate cake base, doused liberally with Raspberry Marie Brizard (raspberry liquer, not as good as Chambord, though), topped with fresh raspberries and then covered in chocolate mousse. (two layers)
Cake was then covered on the sides with crumbled chocolate wafers, the top was edged with more raspberries and then ganached to within an inch of it's sweet, sweet life.

Ooh yeah.


(Top Left: It's like a wafer cobblestone. Like from a Willy Wonka dream. Top Right: "Hey, watch what you're doing with that knife!" Bottom Left: I practiced that icing writing three times on Saran Wrap (on top of a template) before doing it for real. Bottom Right: On first glance, it looks like a landslide disaster. On closer inspection - it's just the miracle of dessert.)

While nibbling on my second slice, I was asked whether or not this took me a long time. Yes and no. Yes, it took about a week from start to finish, but I had delayed this cake for a week (frozen the cake layers for the days in between). Technically it would have taken me....three days? One to make the cake. Another to do the mousse and chill. Another to assemble. But that's doing it leisurely and on a good pace. If you try and attempt to do it all in a day - forget it. You're not giving yourself enough breathing time to enjoy the process - not to mention time to do another cake in case you mess up. (I did mess up the mousse - forgot the gelatin, added it in TOO late, made the custard too watery. Start again. Thank G for Costco-quantity FRO eggs.)

But each step, really didn't take me too long. I suppose I've made enough cakes that each step can get completed fairly quickly.

But it's all avec l'amour, mon amie! Bon anniversaire!

(the Lu-monster. Her bark is far worse than her non-existent bite.)

Thursday, August 13, 2009

Flaaaaaake!


That's my Amy Winehouse moment. She wails, "Blaaaaake"; I wail, "Flaaaaaake". By 'Flake', I mean that delicious chocolately imported goodness that can be found at any reputable retailer. I don't really remember the first time I had a Flake bar. But I didn't like it. Perhaps it had something to do with the fact that when I actually ate it, it was half-crumpled, being a survivor of a trans-Atlantic flight from London. But my second Flake experience was with a full, luscious, intact Flake bar that crumbled at the lightest of touch. And it was...delicious. But back to the main point of this post - strawberry ice cream!

I admit, I have more fun thinking of ice cream mix-ins than I do the actual ice cream. Nuts, fruit, chocolate, cookies…whatever’s in the pantry tends to go in – as well as flavor complements. I had made a rough list of ice creams I wanted to make – I love how completely flexible and adaptable ice creams can be – just make your base and add away! One ice cream I think I will make in the fall, will probably be a maple-apple-spiced ice cream. Oh yum. Like..apple pie filling…in ice cream! You get your pie a la mode in a scoop! Anyway, I’m getting carried away in my fantasyland here.

Let me set the stage:

Base? Strawberry ice cream.

Mix-in? Leftover chocolate cake.

Kick it up a notch? Flake chocolate bar.

I was writing a shopping list and at the end I wrote, “Flake. Aaaagggghhhh!”

I love, love, love Flake bars. I love that they look like chocolate ribbon candy – with the gentle folds of chocolate piled into a 7” stick of goodness. How do they do that, anyway? That folding thing? What I like to do is crunch up a Flake bar IN THE WRAPPER, open one end and dump a load of chocolate in my mouth. Like one of those Pixie sticks. (you should see how I dissemble a Caramilk-Rolo)

Oh my god. Could you imagine? Orange or lemon sherbet with a Pixie dust swirl? Be still my beating heart.

Strawberry + chocolate = good times indeed.


*the latest David Lebovitz blog post has a recipe for Caramelized White Chocolate Ice Cream. I shall return triumphant with the results!!


Wednesday, June 3, 2009

John Barricelli's Cherry Chocolate Chunk Cookies

I've had John Barricelli's recipe for Cherry Chocolate Chunk Cookies bookmarked for quite a while and I thought, "toooday's the day. I make those cookies. And fill that egg-cookie jar. Yum." Yes, I had that exact inner dialogue with myself. If you don't know who John Barricelli is, he's a wonderful baker/pastry chef who works in the Martha Stewart empire. He does the bits for Everyday Baking (never seen it on TV, myself) but I've seen him on Everyday Food and many, many times on Martha's tv show (old and new). He's great. He's also coming out with his first cookbook next year, and until it's published, I hungrily await.

I should note that for the recipe below, I did not have a whole cup of dried cherries. So I used a mixture of dried cherries, dried cranberries, white chocolate, dark chocolate with almonds (see last recipe), and Milsean toffee candy. And yes, it was deeeelicious. Unfortunately, all the ingredients didn't 'float' nicely on top, so I had to be creative with the positioning to show off all the ingredients.

Cherry Chocolate Chunk Cookies
c/o John Barricelli

1 1/2 cups flour

1 teaspoon baking soda

1/2 teaspoon salt

1 cup (2 sticks) butter, room temperature
3/4 cup brown sugar
3/4 cup sugar
1 egg

1 teaspoon vanilla

1 1/2 cups oats

1 cup dried cherries

4 1/2 oz chocolate, chopped

1 cup toffee pieces, chopped


Preheat oven to 350F. Cream butter and sugars together until light and fluffy. Add egg and vanilla and beat until combined. Scrape down bowl. Sift together flour and baking soda and add into the butter mixture. Add oats, cherries, chocolate, and toffee. Doll out even portions of batter on a cookie sheet and bake until golden brown, around 13-15 minutes, depending on size.

Monday, May 25, 2009

I'm not done with you, my sweet.

As though I'd stop at marshmallows!


I've gotten the mothership to start saving egg yolks for me in preparation for the next batch of ice cream. I had tipped of T that I had a pound of Trader Joe chocolate up for use - it turns out that I had purchased the right 'colour' of packaging, but it contained almonds as well! (Dark chocolate with almonds, I wanted sans.) She offered to take the goods off my hands in the hopes of making cookies from them (as chips), but unfortunately, I beat her to it. I swear, I really was going to give her the chocolate, but then the realization that I could make Rocky Road ice cream hit! It's hard to find, no? I remember as a child - Rocky Road was as prevalent as vanilla, now...not so much.


This time I chopped up the chocolate (nuts and all) and melted it and incorporated it into the chocolate ice cream recipe listed a few posts back. Did I mention that I used about a tablespoon of instant espresso powder? It added a nice depth. In the process of making the ice cream, I had to strain out the nuts anyway (with any egg solids), but put them back in later. The chocolate with nuts actually made very good....very nutty ice cream! Mmmm...I bet a fruit 'n nut ice cream would be great. Vanilla base...with a hit of rum? Oh yes. She will be mine.

For those inquiring minds, I did not prefreeze the marshmallows and they still stayed pillowy soft. Lovely.


This ice cream will be the showcase at a small gathering of
University friends in a few days. I found a recipe for waffle cones - so I'm thinking, "asymmetrical waffle bowls, ice cream, and Grand Marnier caramel." The caramel, I bought at the recent food show - it's by Caramoomel a local specialty-foods company. They make an impressive line of different flavoured caramel spreads and dips. I was greedy and I tried every single flavour. If you ask me, I thought the Dulce de Leche was the best, but I already have DdL, so the Grand Marnier was the next-best thing.

I'll try and stop my guests from devouring the dessert before appropriate photos are taken.

Until then!

Friday, May 8, 2009

Self-Medicating with Cake

Don't worry. It's just chocolate cake. Delicious, fudgy, chocolate cake. With chocolate frosting. I'm going through a bit of a down time, so what's a better pick-me-up than chocolate cake? It's such a female cliche, but I embrace it wholeheartedly. And if you have a problem with it - no cake for you!

(that unforgettable first bite...)

I did practice a modicum of self-control, I only made a half portion (yield = 6 cupcakes) so I wouldn't be swimming in cake for the next week or so. Not that it's a bad thing.

Chocolate Cake
(1/2 portion recipe, yield - 6 cupcakes)

4 tablespoons butter
1 oz chocolate, bittersweet, chopped
1/4 cup cocoa powder

1/3 cup flour
1/4 teaspoon baking soda
1/3 teaspoon baking powder
1 egg
1/3 cup sugar
1/2 teaspoon vanilla
1/4 teaspoon salt
1/4 cup sour cream


Preheat oven to 350F
Prepare your choice of 8" cake pan (1), 6 cup muffin tin or
mini-muffin tin.

Combine butter, chocolate, and cocoa. Melt and set aside.
Sift together flour, baking soda, and baking powder in a small bowl.
In a medium bowl, whisk eggs until broken up. Add sugar, vanilla, and salt. Whisk until
thoroughly combined.
Add chocolate and mix until incorporated.

Stir in dry ingredients alternately with sour cream.

Bake until a cake tester comes out clean - about 18-20min.


Chocolate Frosting
(adapted from Mrs.Milman's Frosting, c/o Martha Stewart)

6oz chocolate, chopped
1 cup cream
1 teaspoon corn syrup (oh $^!#. I totally forgot about this!!)
1/4 teaspoon peppermint extract (optional, my extra touch)


In a small saucepan, heat cream and chocolate over medium heat until thickened. About 20 minutes or so. Add corn syrup.
Let set in the fridge for about 2 hours until stiff enough to spread.
Before use, add extract and fold into frosting.


Do you like my cupcake liners? I was watching el Martha and she had some guests from Sweet Revenge bakery (New York, NY) and they use a similar technique with 'yellowed' parchment. This is also the way many Chinese bakeries bake their sponge cakes.
From a typical roll of parchment, unfurl a piece about 5" wide. Cut this strip (5 by 15 or so) into three, so ideally you will have three 'squares' or square-ish shapes. From each corner, cut a slit towards the centre (I am really losing it, I nearly spelled center "scentre") so it kind of looks like you have four 'triangles' merged together at their points. Do not cut all the way to the centre - you want to leave enough space between the cuts (in the middle) that is approximately the diameter of the bottom of your muffin tin. Carefully bring up the sides and overlap them so they form a cup. Carefully place into your muffin tin and fill with batter. I used a large ice cream scoop for equal distribution.

I have to be honest. I ate one frosted cupcake before I thought to put in the peppermint extract. Even for me, it was almost too chocolately. Next time, I will use a milk or semi-sweet in the frosting instead of the 72% dark. So I put in a bit of mint (amazingly- the smell of mint was wafting through the air to inspire me at that moment!) to lighten it up. I would say add as much as you like - I used about 1 teaspoon, but I could have doubled that easily since the chocolate packed so much punch.