I've kind of switched platforms and sites.
So now I'm at www.BAinVancouver.com! Visit me there!
Won't be updating this site anymore. Recipes & photos have been ported over to the other site and are searchable but the posts aren't as polished (preview/header photo, etc.).
Thanks for reading THIS site - it was a great start, let's continue the journey!
Saturday, April 20, 2013
Wednesday, August 15, 2012
Chicago Day 3: Chocolate
A couple of years ago, my birthday present to myself was a chocolate
making course at a local pastry school. It was an all-day course and we learned
how to manipulate chocolate into various forms – including how to temper
chocolate by hand. Tempering chocolate is extremely difficult and takes years
to master. I’ll quickly explain the ‘essence’ of tempered chocolate – it’s when
the crystals in the chocolate form to create that shiny appearance and the nice
firm snap when you bite into a properly tempered bonbon. I’ve had chocolates
that were improperly tempered and let me tell you, nothing is more
disappointing than a mealy, dull piece of chocolate that melts all over your
hands. Yes, an additional perk to tempered chocolate is that it won’t melt at
the slightest touch of human hands – it stays intact and is fairly shelf
stable, which is why tempered chocolate is such a desired skill to have for any
aspiring chocolatier. Anyway, chocolate is melted, then cool and then SLIGHTLY
warmed up again to 88C – at which point it is ready to be worked with. It’s a
very, very delicate art and I admire anyone who can do it successfully. I’ve
avoided tempering chocolate on my own (even though I was gifted a marble slab)
because it is so labour intensive, but after creating some fantastic bonbons in
Chicago, I may be tempted to try it again.
At the Pastry School we were spoiled. If we wanted tempered
chocolate? Visit the chocolate tempering machine. Yes, a machine! I’ve seen
some smaller machines online (kind of looks like a flattened ice cream machine)
– but I have never seen anything like this:

This was a real commercial chocolate tempering machine,
cycling out a steady stream of cocoa goodness that was begging to be molded,
shaped, folded and enrobed into sweet delights. My eyes nearly popped out of
their sockets when I saw it for the first time and chef had to (jokingly) warn
us, “do not put your faces into the chocolate machine!” I’ll be honest. I was
tempted.
We got to work with the machine right away. One of our first
projects was to fill chocolate molds with pear caramel. And we needed to make
the molds! So off we went to collect a container of chocolate! Our setup:
chocolate mold, sheet pan lined with parchment, chocolate spatula, and of
course – chocolate! A chocolate mold, for those unfamiliar is kind of like a
fancy ice cube tray. Instead of simple cubes, there are fancy patterns and
shapes and it can be made of silicon or food grade plastic. (I’ve seen some
metal ones but are seldom used) We held the mold over the sheet pan and tipped
it on a slight angle (towards the pan) and poured the chocolate over the mold,
ensuring that each cavity was filled. We tipped the mold on a steeper angle for
the excess chocolate to run off and using the spatula, we firmly rapped the
sides of the mold to knock out more chocolate. Once we had an even and fairly
thin coating on each cavity, we used the spatula to scrape off the chocolate
from the flat surface of the mold. All the excess chocolate was salvaged on the
parchment paper, which was placed in the chocolate cooler so that it would
later be added BACK to the machine (no waste of chocolate allowed!).
 |
| Raspberry lollipop dipped in chocolate, pear caramel, trio, rum truffle |
Those were the only molds that we used, but we went back to
the machine fairly consistently to get chocolate to enrobe our trios, truffles,
lollipops and to decorate our cake. With the trios and truffles, it was fun to
handle the chocolate by hand – it’s something I’ve always enjoyed. After taking
the course at the Vancouver Pastry School with Chef Ropke, I’ve always paid
close attention to the feel and temperature of tempered chocolate. Although
thermometers are handy and are a good gauge, I believe Chef Ropke’s philosophy
that to know when chocolate is ready – “just put your hands in it!” The
consistency and temperature (successful or not) will be evident to the touch.
Actually – now that I think of it, we used another kind of
chocolate mold to create our trios. The trio bonbon that we created was a
cluster of three caramelized hazelnuts that were placed on a chocolate disc and
then enrobed in chocolate. We used a thin and flat mold with small circular
cutouts to create the discs on a Silpat. We then placed the cluster of nuts on
the disc (while still in a liquid state) and let them firm up in the cooler.
 |
| Chocolate sponge soaked in orange spiced syrup, alternating with chocolate mousse |
well. We didn’t dip the cake in the chocolate – although that would have been
amazing!! We created a ‘ribbon’ of chocolate that would encircle the outside of
the cake and then curls to adorn the top. We used a strip of acetate (thick,
food grade plastic) that we measured and cut to the diameter of our cake. We
poured a small amount of chocolate on the acetate and then using an offset
spatula, spread the chocolate along the length of the acetate strip. We quickly
wrapped the strip (chocolate side FACING the cake) around the cake, making sure
that the edge of the strip was flush to the base and that the ends of the strip
overlapped. After a few minutes in the cooler, the strip was removed and voila!
Our cakes were being hugged by a beautiful band of chocolate. So it serves and
aesthetic AND structural purpose! It’s certainly a tip I will adopt when I make
complex cakes in the future. Of course,
no ‘masterpiece’ cake is complete without chocolate curls! This was done very
easily – we poured some chocolate on our stone counters (not sure if they were
marble or granite) and using an offset spatula, quickly spread out the
chocolate into a very thin layer. The thinner the layer = the faster it will
set. I also discovered that a thinner layer of chocolate yields more delicate
curls. My partner had not created as thin of a layer and the curls I created
using that chocolate were a bit bulky, and to be honest, did not have the nice
crunch as the thinner curls. In any case, it was fun to do and added a lovely
topping to our cake.
Tuesday, August 7, 2012
Chicago Day 2: Croissants
Chef stood at his usual place behind the demonstration
table.
In his French accent, he declared, “Today, we make
croissants.”
He began to explain to us the methodology of croissants and
the work involved. I always knew croissants were tricky and labour-intensive.
Every flaky layer is created by pockets of butter and unlike pie crusts, these
layers were even and flat, there is no cutting or crumbling of butter in
croissants. The croissant is started by making a basic yeast dough, it’s not
particularly special or butter-rich. It was quickly made in the stand mixer and
let to sit out for an hour and a half before spending the night in the fridge.
The next day, we were taught how to incorporate the butter into the dough.
The amount of butter involved was staggering. It was a
brick. Actually, it was a brick plus an additional 10g. I puffed out my cheeks
and let out a long breath. My eyes widened at the thought of integrating that
brick of butter into the dough. When you consider how much butter a portion
contains, it’s not actually that much but to see an entire brick is a bit
overwhelming. He rolled out the dough to a large rectangle, approximately 8”
wide and 14” long. He explained that based on this size, he would have to
create a “butter book” that was around a third of the size. The concept was
that you pound out the butter into a thin sheet that would be folded into the
dough. It would sit in the middle (with about ½ to 1/4 inch edge of dough on
each side) and the two ends of the dough would meet in the middle, creating a
butter sandwich, if you will. He pulled out a large piece of acetate, which is
a piece of clear, thick plastic film that has many purposes in pastry arts. For
example, it’s commonly used to wrap around the outside of cakes for stability
and construction. In this case, the acetate would serve as a containment
wrapping for the butter to be pounded out. Like rolling out a fragile dough
between two pieces of parchment! He measured out the approximate shape of the
book (7.5” wide and 6” long), folded the acetate accordingly and reached for
his rolling pin.
I am sure that in professional kitchens, there are better
ways to do this – but to watch this acclaimed chef vigorously beat a pound of
butter into submission was oddly thrilling. I guess there’s a certain comfort
in the ‘old school’ techniques that connects us to the old masters of pastry
arts. After pounding out the butter into a “book”, he carefully laid it in the
middle of the dough and folded the ends over it, enclosing the butter. He
quickly rolled out this dough lengthwise, back to about 14” long and 8” wide.
He folded the dough again, this time into thirds (like an envelope), keeping
the open edge to his right. This completed one “turn”. Three full turns are
needed to complete the dough before the final rolling. Once you finish a fold
(if the dough is still cool – if not, into the fridge!), roll out the dough
again, emphasizing length to fold into thirds. After the second turn, he sent
us back to our tables to let us try our hands at making the dough.
When we got back to our table, my partner Rachel turned to
me and said, “so…you can do the croissant dough!”
I sighed. This was going to be tough.
But at the same time, I relished the opportunity to bash the
heck out of that butter!
Sunday, July 22, 2012
Day 1: Why Chicago?
I think for those around me on a day to day basis know that I've been planning this Chicago trip for a long time.
At the end of 2010 a beautiful and moving documentary called "The Kings of Pastry" was released in Vancouver. I had heard about this movie months before and the screening week had been highlighted in my calendar well in advance. The movie was everything I wanted in a film: comedy, romance, drama, and a touch of activity. It was about a French pastry chef, Jacquay Pfeiffer and his quest to obtain the MOF distinction in pastry arts. The MOF is kind of like a PhD in a trade - so you could get an MOF in metallurgy, woodworking and of course - pastry arts! (You can also get an MOF in chocolate, yum!) They hold the MOF 'test' every four years (kind of like the Olympics) and over the course of three days the chefs are challenged to create over 40 items that vary from sugarcraft to a wedding cake. They are judged on final presentation, taste and technique. The amount of MOFs awarded each session depends on the quality of competition - so 1 person could get it...or all of them could get it!
Anyway. Beautiful film.
But Jacquay inspired me to look into the French Pastry School (that he co-founded) and to my delight, they offered enthusiast level classes. It was a little late for me to do any vacation planning for that summer but immediately it became my goal to take a course in the summer of 2012. Fast forward a few months and in a turn of events, I was let go from my job. I was sad of course but I had a tidy sum of money that I could use to survive my unemployment...or follow my dreams.
I had promised myself this trip for over a year and unemployment be damned. I have a savings account for a reason, and my old workplace was going to pay for this trip. So the course was booked. The flight reserved. Accommodations secured. And off I went! As a great addition, two friends (plus a husband & baby) came out midway through the trip to join in on the Chicago fun - so really...this was going to be a terrific adventure.
I arrived at the School (after showing up at the wrong building - oops!) and got signed in and fitted for my chef's jacket. It was exciting to finally slip on some proper kitchen whites for the experience. We were each given a hat and apron to keep as well. Our group of 14 aspiring chocolatiers marched off to the lab and met our instructor, Chef Dimitri Fayard. He gave us a tour of our 'classroom' - which included three separate walk-in fridges: a regular fridge, a chocolate cooler and a freezer. The chocolate cooler wasn't as cold as a regular fridge but was cool enough to solidify our treats and keep our confections intact in the warm kitchen. The lab was on the first floor and was the original kitchen for the school. As a result, we also had access to a row of blast freezers and stockrooms that were filled with tools and gadgets I have never seen. As for our own stations - an induction plate and Kitchen Aid mixer sat atop a stone countertop. Underneath were our tools for projects: bowls, sheet pans, Silpats, spatulas, cutting board, etc. One of the nice perks about the class was that we did not have to wash any dishes! All dirty dishes were dropped off at the dish pit to be cleaned by students interning during the summer (our lifesavers). Aaaaand.... they did the scaling for us! So that mean that each recipe's ingredients came on a 1/4 sheet pan with labels on each container. It's a sweet life.
We got going right away. We gathered around the demo table at the front (complete with tilted mirror above) to watch Chef go through about three recipes. Then we went back and attempted to do the same thing. I can barely remember the first three recipes we went through. I think the pear caramels? We made a caramel flavoured with pear liquer that was piped into chocolate molds. Yes, we made actual chocolates! The chocolate came from this amazing machine that dispensed perfectly tempered chocolate all day. It was BYOB - bring your own bucket. Then we made a chocolate ganache for our rum truffles. This was left to sit in the chocolate cooler until we shaped them the next day. I think we also made the chocolate caramel, these were cut into squares later and wrapped. They were delicious - we topped them with sea salt and they were so chewy, soft...and salty! I believe we also started our Trio chocolates. We caramelized sugar and hazelnuts over low heat for a long time - this is so that the nuts effectively 'roast' while building a slow caramel coating. We then 'bundled' the nuts into clusters of 3. We would then put them on chocolate discs and coat them in chocolate (later that week).
We would work through all the recipes bit by bit, so it's hard for me to recount what we did on a specific day. For example, even though the caramels were 'done' - we didn't take them home until the Wednesday. A cake that we finished on Friday was started on Tuesday. A batter would be prepped and then baked the next day. I think even our rum truffles (even though it was started on Monday) were finished on the Thursday.
I was exhausted after our first day. (I should note that after a couple of recipes, we would take a short break and then sit for another demo and then it was right back to our tables until the end of the day.) I also came to a realization that a life in the kitchen was not for me. I love baking for pleasure. I love baking to make me and my friends and family happy. I don't think I could handle the pressure of baking for profit or baking on behalf of someone else. I would just be too stressed about not messing up (which I was) and not enjoying the process. All my mistakes in the kitchen give me an opportunity to improvise - something I know wouldn't exactly 'fly' in a commercial kitchen. I'm glad I came to this realization now, in a leisure class, rather than if I had given up my day job to pursue a life in the kitchen.
Ok - that's a lot of text. More later...Day 2!
Friday, July 13, 2012
Chicaaaago!
Sometimes I can't believe this is the only blog I used to post on.
Now I have two other 'personal' blogs and one other 'work' one that also combines a lot of social media work. So although I haven't been writing a lot here - I have been writing lots elsewhere!
I'm still churning out goodies, just not doing as much photography as they tend to be repeats or "slop on a plate" (that tastes good!). But I do want to explore an amazing experience I recently had - I finally made the trip out to Chicago to the French Pastry School! And took the Pastry Boot Camp, specializing in chocolate!
It was amazing. I feel like I gained so much in experience and knowledge. The Chicago food scene is also amazing as well - it makes sense of course, that the culture of food purveyors, eaters and creatives can support a facility like the FPS.
I think the best way to do it is really to break it down day by day, blow by blow - really to make up for the lack of posting but also to use this blog as a journal of sorts, and try to capture some of the magic I had in Chicago...!
Day 1 coming soon :)
Friday, June 8, 2012
Lemon Coconut Bars
I generally bake when:
My criteria?
Nothing too heavy (egg yolks). Nothing too sugary. Something easy and with ingredients I already have at home (sorry thyme-infused custards).
 The recipe that fit the bill was the lemon coconut bars - a simple lemon custard on top of a crunchy coconut base. Two of my favourite things! As always, I read the reviews - the Epicurious ones are great because the reviewers spare no detail in what they found worked, didn't work and what they would change. Almost unanimously, the reviewers said to double the custard (no problem there!). This is a significant deviation from the recipe and without the careful advice of my fellow bakers, I would have thought my lemon custard to be quite thin. So if there is an opportunity - read the reviews!
The bars came out perfectly and to be honest, I had scoffed down a portion before I remembered to put on the icing sugar. As always - the cooling & setting (thus, waiting) is the hardest part! I recommend making this in the morning, let it sit while you do your errands and enjoy this with a cup of tea in the afternoon.
Give it a try! Recipe here.
- I feel inspired to create
- I'm craving something in particular
- I've been tasked (Mothership)
- Luckily the topic for this post is for "craving".
My criteria?
Nothing too heavy (egg yolks). Nothing too sugary. Something easy and with ingredients I already have at home (sorry thyme-infused custards).

The bars came out perfectly and to be honest, I had scoffed down a portion before I remembered to put on the icing sugar. As always - the cooling & setting (thus, waiting) is the hardest part! I recommend making this in the morning, let it sit while you do your errands and enjoy this with a cup of tea in the afternoon.
Give it a try! Recipe here.
 |
| Sugar on top, gooey custard, crunchy crust = perfect square |
Tuesday, May 1, 2012
More Meatless
Meatless April is over! Now to Meat-filled May, haha!
I'm happy to have the option to eat meat again, but I did really enjoy the vegetarian stint. It was tough when I was eating out, but at certain restaurants that embraced vegetarian cuisine, it was heavenly (Chapandaz Restaurant in Port Moody, Nuba). I do want to continue eating more vegetables and with the upcoming summer season, I know that I'll have that opportunity.
Now for some more photographic evidence of my meals!
 |
| Grilled cheese: cinnamon raisin bread, red cheddar cheese, Paul Newman salsa |
 |
| Mixed green salad topped with spiced tofu, grapefruit wedges, walnuts |
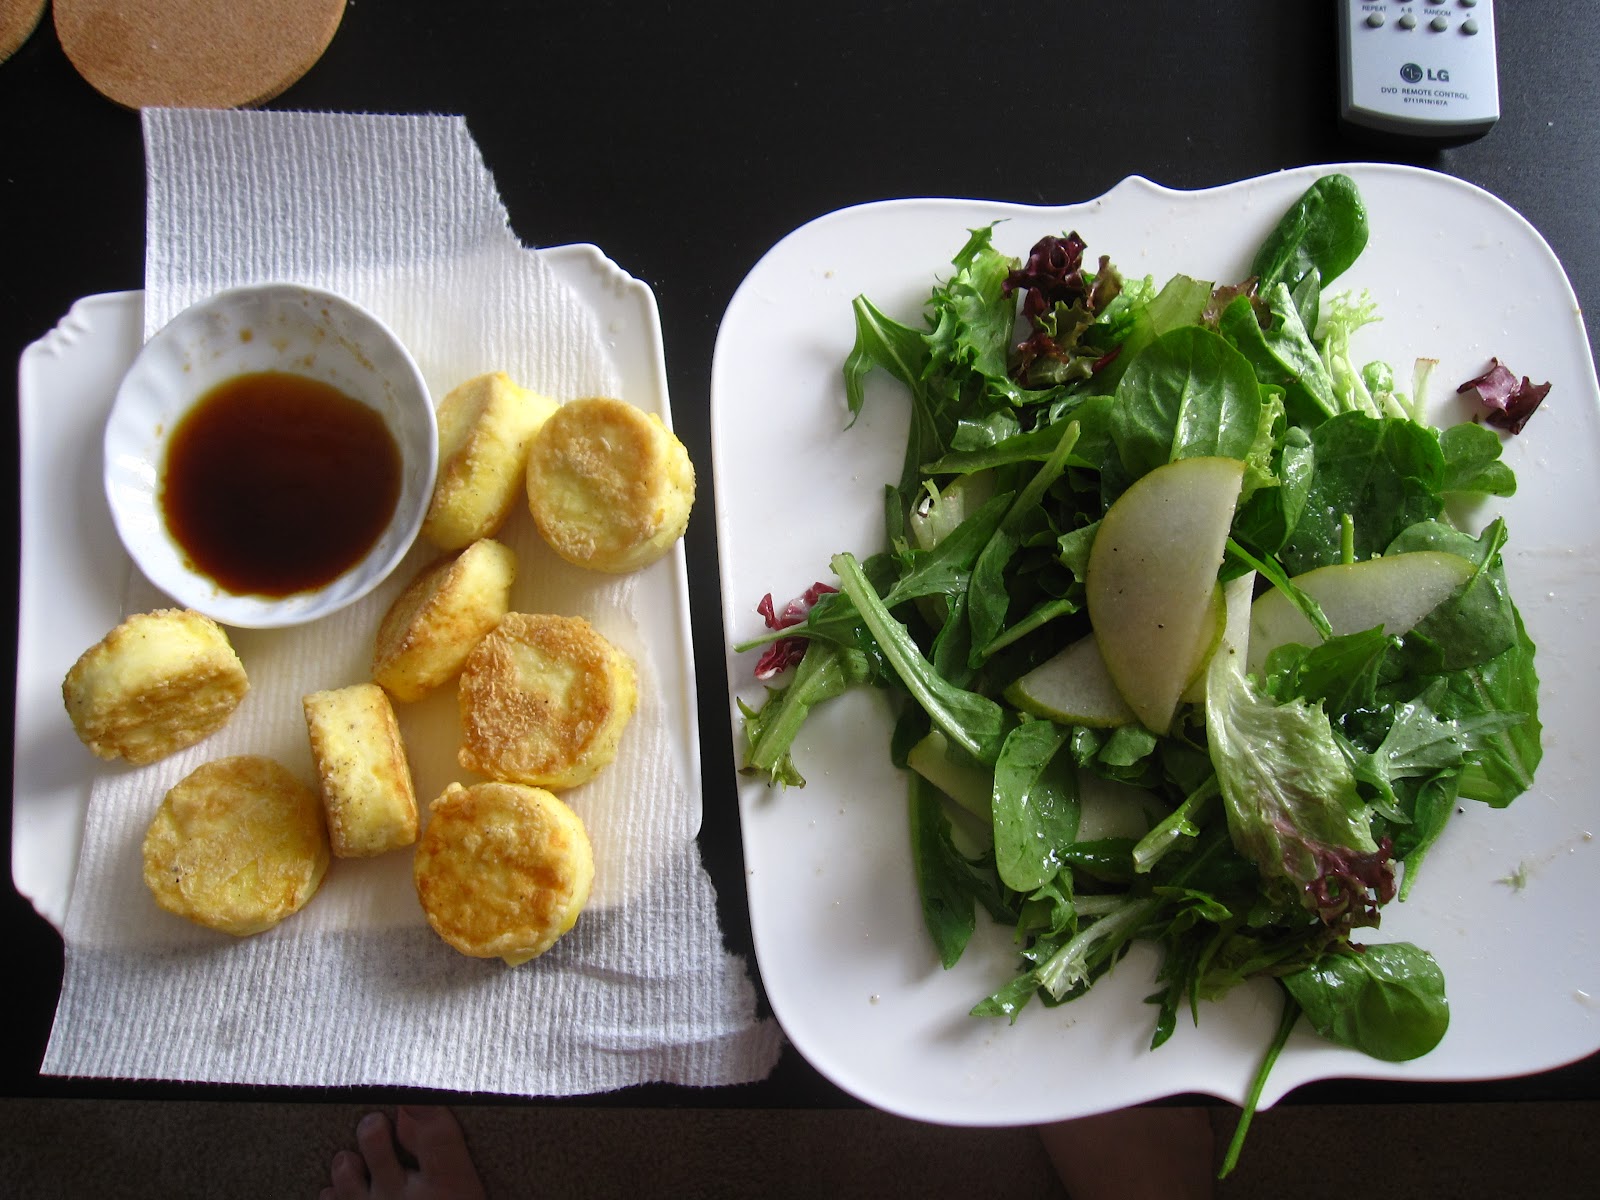 |
| Crispy fried egg tofu, mixed greens in a garlic dressing topped with sliced pears |
 |
| Vegetarian yakisoba! |
Subscribe to:
Posts (Atom)