Monday, October 11, 2010

Turkey Tales Pt. 4 - The Big Day!

They came. They saw. They ate.

It was goooood.

The bird was lifted out of the brine at around 9am to chill in the fridge uncovered until it was stuffed & loaded into the oven around 11:30am for 6pm eat time. I always underestimate how awesome my oven is. It's gas - btw, top AND bottom, so yes, it's a little frightening to hear the "click click" of the ignition, but once it gets to a certain temperature, it STAYS there. Only one mishap to report too - so with an oven thermometer, I've had very good luck. I mention this because even at 375F, my turkey cooked exceptionally fast - and browned nicely about halfway, so it was tinfoil tented for the rest of the time. I had some leftover stuffing, so it got put into a loaf pan as a side.

 (Skin splittin' good!)


My side dishes didn't get started until about 4:30pm - potatoes (whole, unpeeled) were put in a large pot and boiled until tender and them mixed with cream cheese, butter, and cream. My onion bake was assembled and heated up in the last 45 minutes and I decided to skip the zucchini & carrot dish altogether as it would have been too much. Another guest brought a delicious brussel sprout dish and J (of T&J) prepared some roasted butternut squash.

What was served:
Cider brined turkey with stuffing (2 ways)
Dried cherry & cranberry sauce
'Big Martha' mashed potatoes
Roasted onion, crouton & gruyere bake
Brussel Sprouts with bacon & walnuts
Roasted butternut squash


Oh, and gravy too. Not homemade though. More on that tomorrow!

Happy Thanksgiving!

Saturday, October 9, 2010

Turkey Tales Pt 3 - The Day Before

So. The big day is tomorrow!

I gave in last night and let my turkey soak in a 'pre-brine' - still in the package, but floating in a cool bath in the fridge to speed up the thawing process. It worked because the bird was nice and squishy the next morning - ready for the final brine! I had a couple extra things to pick up, so I joined the hordes of people at the local grocery store to pick up some last minute items. The mothership graciously picked up all the items on my list (that I had meticulously itemized by department and then specified quantity & size with descriptions to aid her) and had packed it all up in my fridge, but there were a few things I wanted to pick out  myself. Or that I knew she would have some difficulties finding. I made it home and started the process for my brine - here's what it looked like in the stockpot:
Included in this brine are: 1 sliced apple, 2 sprigs fresh sage, 4 sprigs fresh rosemary, 3 sprigs fresh thyme, 5 bay leaves, 1 tablespoon black peppercorns, 3 sticks of cinnamon, 2 cups of coarse salt and 2 litres of apple cider.

After bringing this to a boil, I added about 3L of cool water to bring down the temperature. After about 30 minutes, I transferred it over to my brining tub and added more water. You must not soak your turkey until your brining liquid is cool - I forgot why, but it's got something to do with bacterial growth I think. I'll be sure to do some research and update this post.
(below - brining tub with brine, turkey in brine in fridge!)

So fingers crossed it will work out. I'm taking it out at around 8am to dry and chill. At around noon it should be stuffed and ready to be cooked! I also worked on the cranberry sauce - which is super easy. It's basically a cranberry jam. I've done it in the past with dried cherries and it worked out really well so I made it again, although I don't remember which recipe I used so I had to kind if improvise a bit. Here's a picture of it in the saucepan with all the key ingredients:
Included is - 1 package of cranberries, 1 cup dried cherries, 1/2 cup white sugar, 1/2 cup brown sugar, 1 tablespoon red wine vinegar, 1 cup of water.

Let cook, enjoy hearing the cranberries pop and smush away! The cranberries should release all their wonderful juice and let reduce, like jam! I still had the entire day ahead of me, so under Koi's supervision I also prepared the 'onion part' of a roasted onion/gruyere dish I'm adding tomorrow. It's pretty much different kinds of onions, lightly seasoned and then roasted until soft. Prep some croutons & sprinkle on top and then add gruyere cheese and bake until bubbly! I decided to get ahead of the game and roast the onions, which will save me a lot of time tomorrow. It will reheat in the oven while the turkey is resting before carving.

So T-minus 19 hours until eating time!

Thursday, October 7, 2010

Turkey Tales Pt 2

The turkey continues to thaw in the fridge - on the label it stated that a bird weighing 20 lbs should take about 4-5 days to thaw. I'm cutting it close - his/her fate is a lovely spiced brine bath where it will sit overnight. If it's still pretty solid on Friday night - it's getting a nice lukewarm bath in the sink to speed up the process.

So the menu for Sunday is pretty simple - turkey & stuffing, cranberry sauce, mashed potatoes and maybe a side. I explicitly explained to my guests that this is going to be a pretty casual dinner and most of them have generously volunteered to bring sides. When planning a big dinner like this - and with limited resources - it's best to think ahead and consider what dishes you can make ahead and heat up last minute. Or have friends you trust to bring dishes!

Step 1 (a): Set Your Menu

Technically, you should really do this first, before buying your turkey. But heck - it takes 4 days to thaw anyway!

Turkey with Sausage Stuffing Two Ways
Cranberry & Cherry Chutney
Cream Cheese Mashed Potatoes
Zucchini and Carrot 'Pasta'

Tomorrow - let's discuss all the frilly fun stuff :P

Wednesday, October 6, 2010

Turkey Tales Pt 1

So yes, it's been a long time since I've posted on el blog - sorry to let anyone down!
I've been busy! A 17lb fur baby named Koi has taken up most of my days and nights, and whines incessantly in between. I went road tripping for a weekend and then it was a week of 1:1 dog care (Koi stays at the mothership's full time, I alternate walks and drop by at least once a day for some cuddles) which pretty much ate up my time until now.

Which brings us to this weekend - Thanksgiving!

I am attempting to make a turkey dinner on Sunday for family and friends - my first real foray into turkey! This Spoon's family is quite small, so we've always eaten chicken on holidays or gone to friends' houses for turkey - I've never hosted a real traditional Thanksgiving. Until now!

So join me, dear readers as we count down to turkey day!

Step 1:

Buy turkey - start thaw.

Yes, I bought it frozen. Since it's my first turkey, I opted for the good ol' Butterball variety - I didn't want to do too much research for fresh turkeys and the politics that go into it, as well as the extra hassle in securing a fresh one for the big day! I picked out a nice fat 20lb turkey and it's sitting in my fridge thawing away.

The plan of action is for it to finish thawing by Saturday morning - at which point it will sit in a spiced brine bath until Sunday morning, sit out for a bit and then go in the oven promptly at 11-11:30am to be ready for 6pm. Yes, it will be stuffed - so I'm allotting some extra time and anticipating a 7pm eat time.

So I guess that's it for now. Nothing else to do really until Friday/Saturday. Tomorrow - I'll discuss what is on the menu!

Thursday, September 23, 2010

First Birthday Cake of the Season!

I think I mentioned a few posts ago about ramping up for the fall, or in my life, "birthday cake baking season". It's a long, long season - very sweet, of course - and very rewarding! It's also a great opportunity for me to put some new recipes to use and rethink old classics. Sometimes, it doesn't work out - but hey, even the scraps are delicious!

I was a bit squeezed for time for this particular cake, but it all managed to turn out. Kind of. At least I didn't drop it! :P (if that is any clue as to who the recipient was) The cake itself turned out great, but I didn't plan very well in terms of transporting the cake throughout the various steps of preparation. Basically - once you bake, cool & trim the cake, get it on the final base/plate. Don't move it around like I did! I think for me, I didn't have a premade board ready nor was my cake stand small enough to fit in my fridge! Looks like I'm in the market for a cake plate! (I'd love to get an antique glass one!!)


The cake: Yellow Butter Cake c/o Martha Stewart (I added in the chocolate chips)

The filling: Seven Minute Frosting

The icing: Whipped Dark Chocolate Ganache

The decorations: Novelty Marbled M&Ms

Lessons Learned:
- Cake, although rich and butter was too dense for the filling - a sponge would have been more appropriate.
- The filling would ooze out at the slightest pressure, in retrospect, I would have used the ganache as a filling instead.
- The ganache was too sturdy! It spread too thin and crumbled during cutting in a really unattractive way.
- I think I would have switched the filling and icing - the Frosting would have added a lot of drama and volume and the richness of the ganache would have been a nice contrast.


The decorations were some marbled M&Ms I received a while ago from my brother. I think you can buy them in some stores now, but aren't they beautiful? I actually wanted to tile the entire outside with the candies, but I'm not sure I would have had enough. I decided to go with a freeform pattern on top and on the sides. Although the final product lacked that polish, I am still pretty pleased with the results. There are definitely lessons I learned here that will probably come in handy for the rest of the season!


Stay tuned for the next cake!

Sunday, September 19, 2010

Learning to Work with Chocolate

This year for my birthday I decided to do something special for myself - to take a class in chocolate-making! I think the term "chocolate making" is a little deceptive. If you are in the chocolate industry to 'make' chocolate is to take it from the plant, extract the bean, roast, pulverize and blend. However, in this class we took already 'made' chocolate and coaxed it into the more traditional forms of truffles and mendiants. I actually took a vacation day from work to take this all-day class: 6 hours of stirring, marbling, piping, dipping and tasting chocolate from cocoa butter to 80%.

In other words - it was a truly magical day.

I feel like I learned so much - not only about HOW to make chocolate but the science and sense of making chocolate. We spent a significant amount of time smelling different 'scents' found in chocolate and tasting different kinds of chocolate (single origin and blended) and that process made me appreciate the quality chocolate I have had the pleasure of eating in the past. And how complex! Wow, how complex... I really had no idea chocolate had so many subtle layers, tones and notes. Kind of like coffee - I suppose. It was amazing how the ORIGIN of the bean would affect the flavor of the coffee! My favourite? Peruvian and Ecuadorian - the ones we tried had more distinct floral and sweet flavour, even though both were equally 'dark' chocolate.

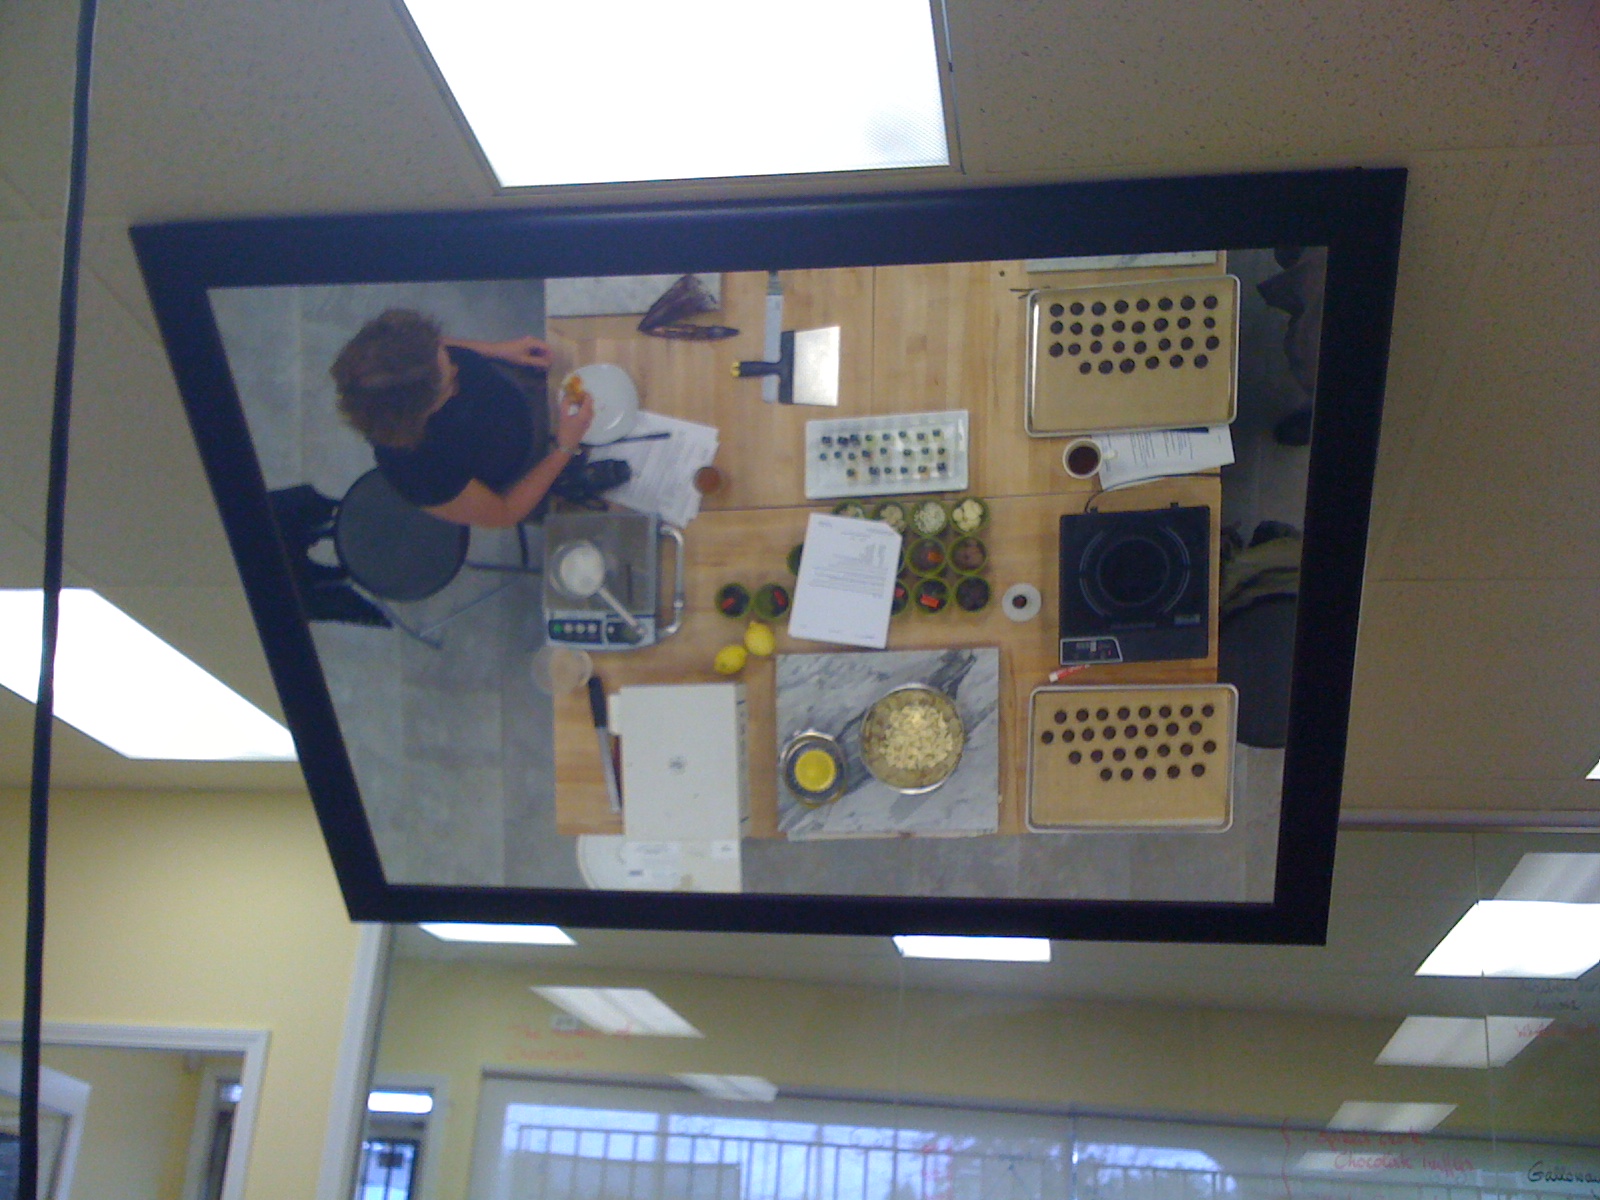
 A picture of the mirror above chef Marco. If you can see those green ramekins in the reflection, we got to taste ALL of those chocolates! Yes, we worked hard. Very hard.

A couple of snapshots of our work area. Under our Boos counter? Beautiful Kitchen Aid Pro 6s ready to be put into action! Yum! 
A chocolate 'tumbler' and a line of induction stovetops for heating up our saucepans to melt chocolate (a la double boiler) and also the heat up cream for the ganache. They worked SO well - I am almost tempted to shell out the dough for a stovetop. Seriously - the induction stovetop works with the magnetic element in cookware to heat up the vessel - so much of the residual heat is eliminated, as well as any messy scalded-on foodstuffs. It heated up the cream and water SO fast - I can see why they are used in candy making!
Chef Marco Ropke speaking to the troops and dispensing his wisdom! I have to say, if there was one major reason for me to take another class, it would be because of him. Chef Marco was professional, helpful, funny, and a terrific teacher - I highly recommend being under his tutelage!
(above) Marbled-whipped and piped dark chocolate ganache. These would later be dipped in tempered chocolate and rolled in cocoa powder. (below) Lime & coconut white chocolate ganache is piped into premade truffle shells (my god! no one told me these existed!). Unfortunately we didn't have time to finish them (closing off the top & another coat of white chocolate) but no matter - they were still delicious!

The bounty. Oh yeah.

I was blessed and cursed to be the odd person out in the 7-person class. I didn't have to work with a buddy which meant double the work - but double the goodies to take home! And take home I did! Two chocolates seen above, I did not document - the hazelnut nougatine and chocolate mendiants. The nougatine was divine - a whipped milk chocolate ganache with crunched up caramelized hazelnuts dipped in tempered dark chocolate and rolled in icing sugar. Amazing. The ganache was fluffy and soft and the caramelized nuts added a depth of texture and flavor that was mind-blowing. I will definitely be making those again! The dark chocolate mendiants are tempered chocolate piped into molds and topped with nuts and dried fruit. So simple, yet so delicious.

Two main things I learned:

1) Quality of chocolate COUNTS. One prime example of this are the chocolate mendiants. By themselves, they are a very simple confection. Tempered chocolates piped into molds and studded with fruits and nuts. But the usage of high grade dark chocolate works with the toppings to create a layered and lush experience that cannot be replicated with generic store-bought chocolate. The break of the chocolate is crisp - it doesn't melt into your hands and the flavour is savored not only with your tongue, but your nose and throat - the scent and texture of the chocolate create an experience that is unlike any other.

2) Making chocolate is damn hard. My biceps HURT the next day. Fold chocolate over and over on a marble slab is hard work. Stirring to melt chocolate is hard work. Whipping chocolate is hard work. Dipping and rolling chocolate is hard work. Making chocolate is hard work.

I would love to take more classes in the future - and luckily they are starting a batch of evening classes to accomodate those who work full-time - now to start saving up!

There is something to be said about actually taking a hands-on class like this. Yes, it is expensive; yes it is labour intensive - but there are tips & tricks conveyed here that you cannot get through a cookbook or TV show. We stuck our hands IN the chocolate (and yes, it was amazing) to feel the temperature of chocolate. We let pure cocoa butter crumble in our mouths. We watched our ganaches split (not mine, tee hee) and worked hard to bring them back to life again. These are the real lessons learned in the class - not just how to follow a recipe.

Thank you Marco & the Vancouver Pastry School!

Saturday, September 11, 2010

Meet Koi!

I haven't had a lot of time to bake or cook recently - our family recently adopted a dog! This is our family's first dog - her name is Koi and she's an 8 yr old Shiba Inu and totally adorable and cute! The Mothership is her primary carer and Koi lives with her. The Mothership does all the daily care, but I stop in every day after work to take Koi for a walk and on the weekends, I spend a bit more time with her and thus, the baking has taken a backseat to the newest member of our family. But it's worth it!

I've only made one thing notable recently - just a twist on the blueberry lemon bundt - I mixed it up by baking with some fresh blackberries I picked and it was a great success! I am trying to ramp up my energies for the next couple of months because birthday season is LITERALLY just around the corner! I have my first cake next week! I am actually thinking of making a "Koi" cake - kind of like a tiger cake - a combination of black, white, and brown/orange elements. This is generally a combination of different flavours of those colors - whether it is chocolate, vanilla, caramel, orange, etc. I have a couple of ideas floating around the ol' noggin, so let's see what I can conjure up.

I also have an exciting story about something I did yesterday - a day-long chocolate making class! WOW! What an experience. My arms are still sore from mixing, folding, stirring, and working chocolate for the whole day. If the classes weren't so expensive, I would do the entire 6-session course, but for now, this was my birthday treat.

Thanks, Spoon - I had a great time and now have enough chocolate for the next few months!

(Koi relaxing in her bed)