I've kind of switched platforms and sites.
So now I'm at www.BAinVancouver.com! Visit me there!
Won't be updating this site anymore. Recipes & photos have been ported over to the other site and are searchable but the posts aren't as polished (preview/header photo, etc.).
Thanks for reading THIS site - it was a great start, let's continue the journey!
Saturday, April 20, 2013


Wednesday, August 15, 2012
Chicago Day 3: Chocolate
A couple of years ago, my birthday present to myself was a chocolate
making course at a local pastry school. It was an all-day course and we learned
how to manipulate chocolate into various forms – including how to temper
chocolate by hand. Tempering chocolate is extremely difficult and takes years
to master. I’ll quickly explain the ‘essence’ of tempered chocolate – it’s when
the crystals in the chocolate form to create that shiny appearance and the nice
firm snap when you bite into a properly tempered bonbon. I’ve had chocolates
that were improperly tempered and let me tell you, nothing is more
disappointing than a mealy, dull piece of chocolate that melts all over your
hands. Yes, an additional perk to tempered chocolate is that it won’t melt at
the slightest touch of human hands – it stays intact and is fairly shelf
stable, which is why tempered chocolate is such a desired skill to have for any
aspiring chocolatier. Anyway, chocolate is melted, then cool and then SLIGHTLY
warmed up again to 88C – at which point it is ready to be worked with. It’s a
very, very delicate art and I admire anyone who can do it successfully. I’ve
avoided tempering chocolate on my own (even though I was gifted a marble slab)
because it is so labour intensive, but after creating some fantastic bonbons in
Chicago, I may be tempted to try it again.
At the Pastry School we were spoiled. If we wanted tempered
chocolate? Visit the chocolate tempering machine. Yes, a machine! I’ve seen
some smaller machines online (kind of looks like a flattened ice cream machine)
– but I have never seen anything like this:

This was a real commercial chocolate tempering machine,
cycling out a steady stream of cocoa goodness that was begging to be molded,
shaped, folded and enrobed into sweet delights. My eyes nearly popped out of
their sockets when I saw it for the first time and chef had to (jokingly) warn
us, “do not put your faces into the chocolate machine!” I’ll be honest. I was
tempted.
We got to work with the machine right away. One of our first
projects was to fill chocolate molds with pear caramel. And we needed to make
the molds! So off we went to collect a container of chocolate! Our setup:
chocolate mold, sheet pan lined with parchment, chocolate spatula, and of
course – chocolate! A chocolate mold, for those unfamiliar is kind of like a
fancy ice cube tray. Instead of simple cubes, there are fancy patterns and
shapes and it can be made of silicon or food grade plastic. (I’ve seen some
metal ones but are seldom used) We held the mold over the sheet pan and tipped
it on a slight angle (towards the pan) and poured the chocolate over the mold,
ensuring that each cavity was filled. We tipped the mold on a steeper angle for
the excess chocolate to run off and using the spatula, we firmly rapped the
sides of the mold to knock out more chocolate. Once we had an even and fairly
thin coating on each cavity, we used the spatula to scrape off the chocolate
from the flat surface of the mold. All the excess chocolate was salvaged on the
parchment paper, which was placed in the chocolate cooler so that it would
later be added BACK to the machine (no waste of chocolate allowed!).
 |
| Raspberry lollipop dipped in chocolate, pear caramel, trio, rum truffle |
Those were the only molds that we used, but we went back to
the machine fairly consistently to get chocolate to enrobe our trios, truffles,
lollipops and to decorate our cake. With the trios and truffles, it was fun to
handle the chocolate by hand – it’s something I’ve always enjoyed. After taking
the course at the Vancouver Pastry School with Chef Ropke, I’ve always paid
close attention to the feel and temperature of tempered chocolate. Although
thermometers are handy and are a good gauge, I believe Chef Ropke’s philosophy
that to know when chocolate is ready – “just put your hands in it!” The
consistency and temperature (successful or not) will be evident to the touch.
Actually – now that I think of it, we used another kind of
chocolate mold to create our trios. The trio bonbon that we created was a
cluster of three caramelized hazelnuts that were placed on a chocolate disc and
then enrobed in chocolate. We used a thin and flat mold with small circular
cutouts to create the discs on a Silpat. We then placed the cluster of nuts on
the disc (while still in a liquid state) and let them firm up in the cooler.
 |
| Chocolate sponge soaked in orange spiced syrup, alternating with chocolate mousse |
well. We didn’t dip the cake in the chocolate – although that would have been
amazing!! We created a ‘ribbon’ of chocolate that would encircle the outside of
the cake and then curls to adorn the top. We used a strip of acetate (thick,
food grade plastic) that we measured and cut to the diameter of our cake. We
poured a small amount of chocolate on the acetate and then using an offset
spatula, spread the chocolate along the length of the acetate strip. We quickly
wrapped the strip (chocolate side FACING the cake) around the cake, making sure
that the edge of the strip was flush to the base and that the ends of the strip
overlapped. After a few minutes in the cooler, the strip was removed and voila!
Our cakes were being hugged by a beautiful band of chocolate. So it serves and
aesthetic AND structural purpose! It’s certainly a tip I will adopt when I make
complex cakes in the future. Of course,
no ‘masterpiece’ cake is complete without chocolate curls! This was done very
easily – we poured some chocolate on our stone counters (not sure if they were
marble or granite) and using an offset spatula, quickly spread out the
chocolate into a very thin layer. The thinner the layer = the faster it will
set. I also discovered that a thinner layer of chocolate yields more delicate
curls. My partner had not created as thin of a layer and the curls I created
using that chocolate were a bit bulky, and to be honest, did not have the nice
crunch as the thinner curls. In any case, it was fun to do and added a lovely
topping to our cake.
Tuesday, August 7, 2012
Chicago Day 2: Croissants
Chef stood at his usual place behind the demonstration
table.
In his French accent, he declared, “Today, we make
croissants.”
He began to explain to us the methodology of croissants and
the work involved. I always knew croissants were tricky and labour-intensive.
Every flaky layer is created by pockets of butter and unlike pie crusts, these
layers were even and flat, there is no cutting or crumbling of butter in
croissants. The croissant is started by making a basic yeast dough, it’s not
particularly special or butter-rich. It was quickly made in the stand mixer and
let to sit out for an hour and a half before spending the night in the fridge.
The next day, we were taught how to incorporate the butter into the dough.
The amount of butter involved was staggering. It was a
brick. Actually, it was a brick plus an additional 10g. I puffed out my cheeks
and let out a long breath. My eyes widened at the thought of integrating that
brick of butter into the dough. When you consider how much butter a portion
contains, it’s not actually that much but to see an entire brick is a bit
overwhelming. He rolled out the dough to a large rectangle, approximately 8”
wide and 14” long. He explained that based on this size, he would have to
create a “butter book” that was around a third of the size. The concept was
that you pound out the butter into a thin sheet that would be folded into the
dough. It would sit in the middle (with about ½ to 1/4 inch edge of dough on
each side) and the two ends of the dough would meet in the middle, creating a
butter sandwich, if you will. He pulled out a large piece of acetate, which is
a piece of clear, thick plastic film that has many purposes in pastry arts. For
example, it’s commonly used to wrap around the outside of cakes for stability
and construction. In this case, the acetate would serve as a containment
wrapping for the butter to be pounded out. Like rolling out a fragile dough
between two pieces of parchment! He measured out the approximate shape of the
book (7.5” wide and 6” long), folded the acetate accordingly and reached for
his rolling pin.
I am sure that in professional kitchens, there are better
ways to do this – but to watch this acclaimed chef vigorously beat a pound of
butter into submission was oddly thrilling. I guess there’s a certain comfort
in the ‘old school’ techniques that connects us to the old masters of pastry
arts. After pounding out the butter into a “book”, he carefully laid it in the
middle of the dough and folded the ends over it, enclosing the butter. He
quickly rolled out this dough lengthwise, back to about 14” long and 8” wide.
He folded the dough again, this time into thirds (like an envelope), keeping
the open edge to his right. This completed one “turn”. Three full turns are
needed to complete the dough before the final rolling. Once you finish a fold
(if the dough is still cool – if not, into the fridge!), roll out the dough
again, emphasizing length to fold into thirds. After the second turn, he sent
us back to our tables to let us try our hands at making the dough.
When we got back to our table, my partner Rachel turned to
me and said, “so…you can do the croissant dough!”
I sighed. This was going to be tough.
But at the same time, I relished the opportunity to bash the
heck out of that butter!
Sunday, July 22, 2012
Day 1: Why Chicago?
I think for those around me on a day to day basis know that I've been planning this Chicago trip for a long time.
At the end of 2010 a beautiful and moving documentary called "The Kings of Pastry" was released in Vancouver. I had heard about this movie months before and the screening week had been highlighted in my calendar well in advance. The movie was everything I wanted in a film: comedy, romance, drama, and a touch of activity. It was about a French pastry chef, Jacquay Pfeiffer and his quest to obtain the MOF distinction in pastry arts. The MOF is kind of like a PhD in a trade - so you could get an MOF in metallurgy, woodworking and of course - pastry arts! (You can also get an MOF in chocolate, yum!) They hold the MOF 'test' every four years (kind of like the Olympics) and over the course of three days the chefs are challenged to create over 40 items that vary from sugarcraft to a wedding cake. They are judged on final presentation, taste and technique. The amount of MOFs awarded each session depends on the quality of competition - so 1 person could get it...or all of them could get it!
Anyway. Beautiful film.
But Jacquay inspired me to look into the French Pastry School (that he co-founded) and to my delight, they offered enthusiast level classes. It was a little late for me to do any vacation planning for that summer but immediately it became my goal to take a course in the summer of 2012. Fast forward a few months and in a turn of events, I was let go from my job. I was sad of course but I had a tidy sum of money that I could use to survive my unemployment...or follow my dreams.
I had promised myself this trip for over a year and unemployment be damned. I have a savings account for a reason, and my old workplace was going to pay for this trip. So the course was booked. The flight reserved. Accommodations secured. And off I went! As a great addition, two friends (plus a husband & baby) came out midway through the trip to join in on the Chicago fun - so really...this was going to be a terrific adventure.
I arrived at the School (after showing up at the wrong building - oops!) and got signed in and fitted for my chef's jacket. It was exciting to finally slip on some proper kitchen whites for the experience. We were each given a hat and apron to keep as well. Our group of 14 aspiring chocolatiers marched off to the lab and met our instructor, Chef Dimitri Fayard. He gave us a tour of our 'classroom' - which included three separate walk-in fridges: a regular fridge, a chocolate cooler and a freezer. The chocolate cooler wasn't as cold as a regular fridge but was cool enough to solidify our treats and keep our confections intact in the warm kitchen. The lab was on the first floor and was the original kitchen for the school. As a result, we also had access to a row of blast freezers and stockrooms that were filled with tools and gadgets I have never seen. As for our own stations - an induction plate and Kitchen Aid mixer sat atop a stone countertop. Underneath were our tools for projects: bowls, sheet pans, Silpats, spatulas, cutting board, etc. One of the nice perks about the class was that we did not have to wash any dishes! All dirty dishes were dropped off at the dish pit to be cleaned by students interning during the summer (our lifesavers). Aaaaand.... they did the scaling for us! So that mean that each recipe's ingredients came on a 1/4 sheet pan with labels on each container. It's a sweet life.
We got going right away. We gathered around the demo table at the front (complete with tilted mirror above) to watch Chef go through about three recipes. Then we went back and attempted to do the same thing. I can barely remember the first three recipes we went through. I think the pear caramels? We made a caramel flavoured with pear liquer that was piped into chocolate molds. Yes, we made actual chocolates! The chocolate came from this amazing machine that dispensed perfectly tempered chocolate all day. It was BYOB - bring your own bucket. Then we made a chocolate ganache for our rum truffles. This was left to sit in the chocolate cooler until we shaped them the next day. I think we also made the chocolate caramel, these were cut into squares later and wrapped. They were delicious - we topped them with sea salt and they were so chewy, soft...and salty! I believe we also started our Trio chocolates. We caramelized sugar and hazelnuts over low heat for a long time - this is so that the nuts effectively 'roast' while building a slow caramel coating. We then 'bundled' the nuts into clusters of 3. We would then put them on chocolate discs and coat them in chocolate (later that week).
We would work through all the recipes bit by bit, so it's hard for me to recount what we did on a specific day. For example, even though the caramels were 'done' - we didn't take them home until the Wednesday. A cake that we finished on Friday was started on Tuesday. A batter would be prepped and then baked the next day. I think even our rum truffles (even though it was started on Monday) were finished on the Thursday.
I was exhausted after our first day. (I should note that after a couple of recipes, we would take a short break and then sit for another demo and then it was right back to our tables until the end of the day.) I also came to a realization that a life in the kitchen was not for me. I love baking for pleasure. I love baking to make me and my friends and family happy. I don't think I could handle the pressure of baking for profit or baking on behalf of someone else. I would just be too stressed about not messing up (which I was) and not enjoying the process. All my mistakes in the kitchen give me an opportunity to improvise - something I know wouldn't exactly 'fly' in a commercial kitchen. I'm glad I came to this realization now, in a leisure class, rather than if I had given up my day job to pursue a life in the kitchen.
Ok - that's a lot of text. More later...Day 2!
At the end of 2010 a beautiful and moving documentary called "The Kings of Pastry" was released in Vancouver. I had heard about this movie months before and the screening week had been highlighted in my calendar well in advance. The movie was everything I wanted in a film: comedy, romance, drama, and a touch of activity. It was about a French pastry chef, Jacquay Pfeiffer and his quest to obtain the MOF distinction in pastry arts. The MOF is kind of like a PhD in a trade - so you could get an MOF in metallurgy, woodworking and of course - pastry arts! (You can also get an MOF in chocolate, yum!) They hold the MOF 'test' every four years (kind of like the Olympics) and over the course of three days the chefs are challenged to create over 40 items that vary from sugarcraft to a wedding cake. They are judged on final presentation, taste and technique. The amount of MOFs awarded each session depends on the quality of competition - so 1 person could get it...or all of them could get it!
Anyway. Beautiful film.
But Jacquay inspired me to look into the French Pastry School (that he co-founded) and to my delight, they offered enthusiast level classes. It was a little late for me to do any vacation planning for that summer but immediately it became my goal to take a course in the summer of 2012. Fast forward a few months and in a turn of events, I was let go from my job. I was sad of course but I had a tidy sum of money that I could use to survive my unemployment...or follow my dreams.
I had promised myself this trip for over a year and unemployment be damned. I have a savings account for a reason, and my old workplace was going to pay for this trip. So the course was booked. The flight reserved. Accommodations secured. And off I went! As a great addition, two friends (plus a husband & baby) came out midway through the trip to join in on the Chicago fun - so really...this was going to be a terrific adventure.
I arrived at the School (after showing up at the wrong building - oops!) and got signed in and fitted for my chef's jacket. It was exciting to finally slip on some proper kitchen whites for the experience. We were each given a hat and apron to keep as well. Our group of 14 aspiring chocolatiers marched off to the lab and met our instructor, Chef Dimitri Fayard. He gave us a tour of our 'classroom' - which included three separate walk-in fridges: a regular fridge, a chocolate cooler and a freezer. The chocolate cooler wasn't as cold as a regular fridge but was cool enough to solidify our treats and keep our confections intact in the warm kitchen. The lab was on the first floor and was the original kitchen for the school. As a result, we also had access to a row of blast freezers and stockrooms that were filled with tools and gadgets I have never seen. As for our own stations - an induction plate and Kitchen Aid mixer sat atop a stone countertop. Underneath were our tools for projects: bowls, sheet pans, Silpats, spatulas, cutting board, etc. One of the nice perks about the class was that we did not have to wash any dishes! All dirty dishes were dropped off at the dish pit to be cleaned by students interning during the summer (our lifesavers). Aaaaand.... they did the scaling for us! So that mean that each recipe's ingredients came on a 1/4 sheet pan with labels on each container. It's a sweet life.
We got going right away. We gathered around the demo table at the front (complete with tilted mirror above) to watch Chef go through about three recipes. Then we went back and attempted to do the same thing. I can barely remember the first three recipes we went through. I think the pear caramels? We made a caramel flavoured with pear liquer that was piped into chocolate molds. Yes, we made actual chocolates! The chocolate came from this amazing machine that dispensed perfectly tempered chocolate all day. It was BYOB - bring your own bucket. Then we made a chocolate ganache for our rum truffles. This was left to sit in the chocolate cooler until we shaped them the next day. I think we also made the chocolate caramel, these were cut into squares later and wrapped. They were delicious - we topped them with sea salt and they were so chewy, soft...and salty! I believe we also started our Trio chocolates. We caramelized sugar and hazelnuts over low heat for a long time - this is so that the nuts effectively 'roast' while building a slow caramel coating. We then 'bundled' the nuts into clusters of 3. We would then put them on chocolate discs and coat them in chocolate (later that week).
We would work through all the recipes bit by bit, so it's hard for me to recount what we did on a specific day. For example, even though the caramels were 'done' - we didn't take them home until the Wednesday. A cake that we finished on Friday was started on Tuesday. A batter would be prepped and then baked the next day. I think even our rum truffles (even though it was started on Monday) were finished on the Thursday.
I was exhausted after our first day. (I should note that after a couple of recipes, we would take a short break and then sit for another demo and then it was right back to our tables until the end of the day.) I also came to a realization that a life in the kitchen was not for me. I love baking for pleasure. I love baking to make me and my friends and family happy. I don't think I could handle the pressure of baking for profit or baking on behalf of someone else. I would just be too stressed about not messing up (which I was) and not enjoying the process. All my mistakes in the kitchen give me an opportunity to improvise - something I know wouldn't exactly 'fly' in a commercial kitchen. I'm glad I came to this realization now, in a leisure class, rather than if I had given up my day job to pursue a life in the kitchen.
Ok - that's a lot of text. More later...Day 2!
Friday, July 13, 2012
Chicaaaago!
Sometimes I can't believe this is the only blog I used to post on.
Now I have two other 'personal' blogs and one other 'work' one that also combines a lot of social media work. So although I haven't been writing a lot here - I have been writing lots elsewhere!
I'm still churning out goodies, just not doing as much photography as they tend to be repeats or "slop on a plate" (that tastes good!). But I do want to explore an amazing experience I recently had - I finally made the trip out to Chicago to the French Pastry School! And took the Pastry Boot Camp, specializing in chocolate!
It was amazing. I feel like I gained so much in experience and knowledge. The Chicago food scene is also amazing as well - it makes sense of course, that the culture of food purveyors, eaters and creatives can support a facility like the FPS.
I think the best way to do it is really to break it down day by day, blow by blow - really to make up for the lack of posting but also to use this blog as a journal of sorts, and try to capture some of the magic I had in Chicago...!
Day 1 coming soon :)
Now I have two other 'personal' blogs and one other 'work' one that also combines a lot of social media work. So although I haven't been writing a lot here - I have been writing lots elsewhere!
I'm still churning out goodies, just not doing as much photography as they tend to be repeats or "slop on a plate" (that tastes good!). But I do want to explore an amazing experience I recently had - I finally made the trip out to Chicago to the French Pastry School! And took the Pastry Boot Camp, specializing in chocolate!
It was amazing. I feel like I gained so much in experience and knowledge. The Chicago food scene is also amazing as well - it makes sense of course, that the culture of food purveyors, eaters and creatives can support a facility like the FPS.
I think the best way to do it is really to break it down day by day, blow by blow - really to make up for the lack of posting but also to use this blog as a journal of sorts, and try to capture some of the magic I had in Chicago...!
Day 1 coming soon :)
Friday, June 8, 2012
Lemon Coconut Bars
I generally bake when:
My criteria?
Nothing too heavy (egg yolks). Nothing too sugary. Something easy and with ingredients I already have at home (sorry thyme-infused custards).
 The recipe that fit the bill was the lemon coconut bars - a simple lemon custard on top of a crunchy coconut base. Two of my favourite things! As always, I read the reviews - the Epicurious ones are great because the reviewers spare no detail in what they found worked, didn't work and what they would change. Almost unanimously, the reviewers said to double the custard (no problem there!). This is a significant deviation from the recipe and without the careful advice of my fellow bakers, I would have thought my lemon custard to be quite thin. So if there is an opportunity - read the reviews!
The bars came out perfectly and to be honest, I had scoffed down a portion before I remembered to put on the icing sugar. As always - the cooling & setting (thus, waiting) is the hardest part! I recommend making this in the morning, let it sit while you do your errands and enjoy this with a cup of tea in the afternoon.
Give it a try! Recipe here.
- I feel inspired to create
- I'm craving something in particular
- I've been tasked (Mothership)
- Luckily the topic for this post is for "craving".
My criteria?
Nothing too heavy (egg yolks). Nothing too sugary. Something easy and with ingredients I already have at home (sorry thyme-infused custards).

The bars came out perfectly and to be honest, I had scoffed down a portion before I remembered to put on the icing sugar. As always - the cooling & setting (thus, waiting) is the hardest part! I recommend making this in the morning, let it sit while you do your errands and enjoy this with a cup of tea in the afternoon.
Give it a try! Recipe here.
 |
| Sugar on top, gooey custard, crunchy crust = perfect square |
Tuesday, May 1, 2012
More Meatless
Meatless April is over! Now to Meat-filled May, haha!
I'm happy to have the option to eat meat again, but I did really enjoy the vegetarian stint. It was tough when I was eating out, but at certain restaurants that embraced vegetarian cuisine, it was heavenly (Chapandaz Restaurant in Port Moody, Nuba). I do want to continue eating more vegetables and with the upcoming summer season, I know that I'll have that opportunity.
Now for some more photographic evidence of my meals!
I'm happy to have the option to eat meat again, but I did really enjoy the vegetarian stint. It was tough when I was eating out, but at certain restaurants that embraced vegetarian cuisine, it was heavenly (Chapandaz Restaurant in Port Moody, Nuba). I do want to continue eating more vegetables and with the upcoming summer season, I know that I'll have that opportunity.
Now for some more photographic evidence of my meals!
 |
| Grilled cheese: cinnamon raisin bread, red cheddar cheese, Paul Newman salsa |
 |
| Mixed green salad topped with spiced tofu, grapefruit wedges, walnuts |
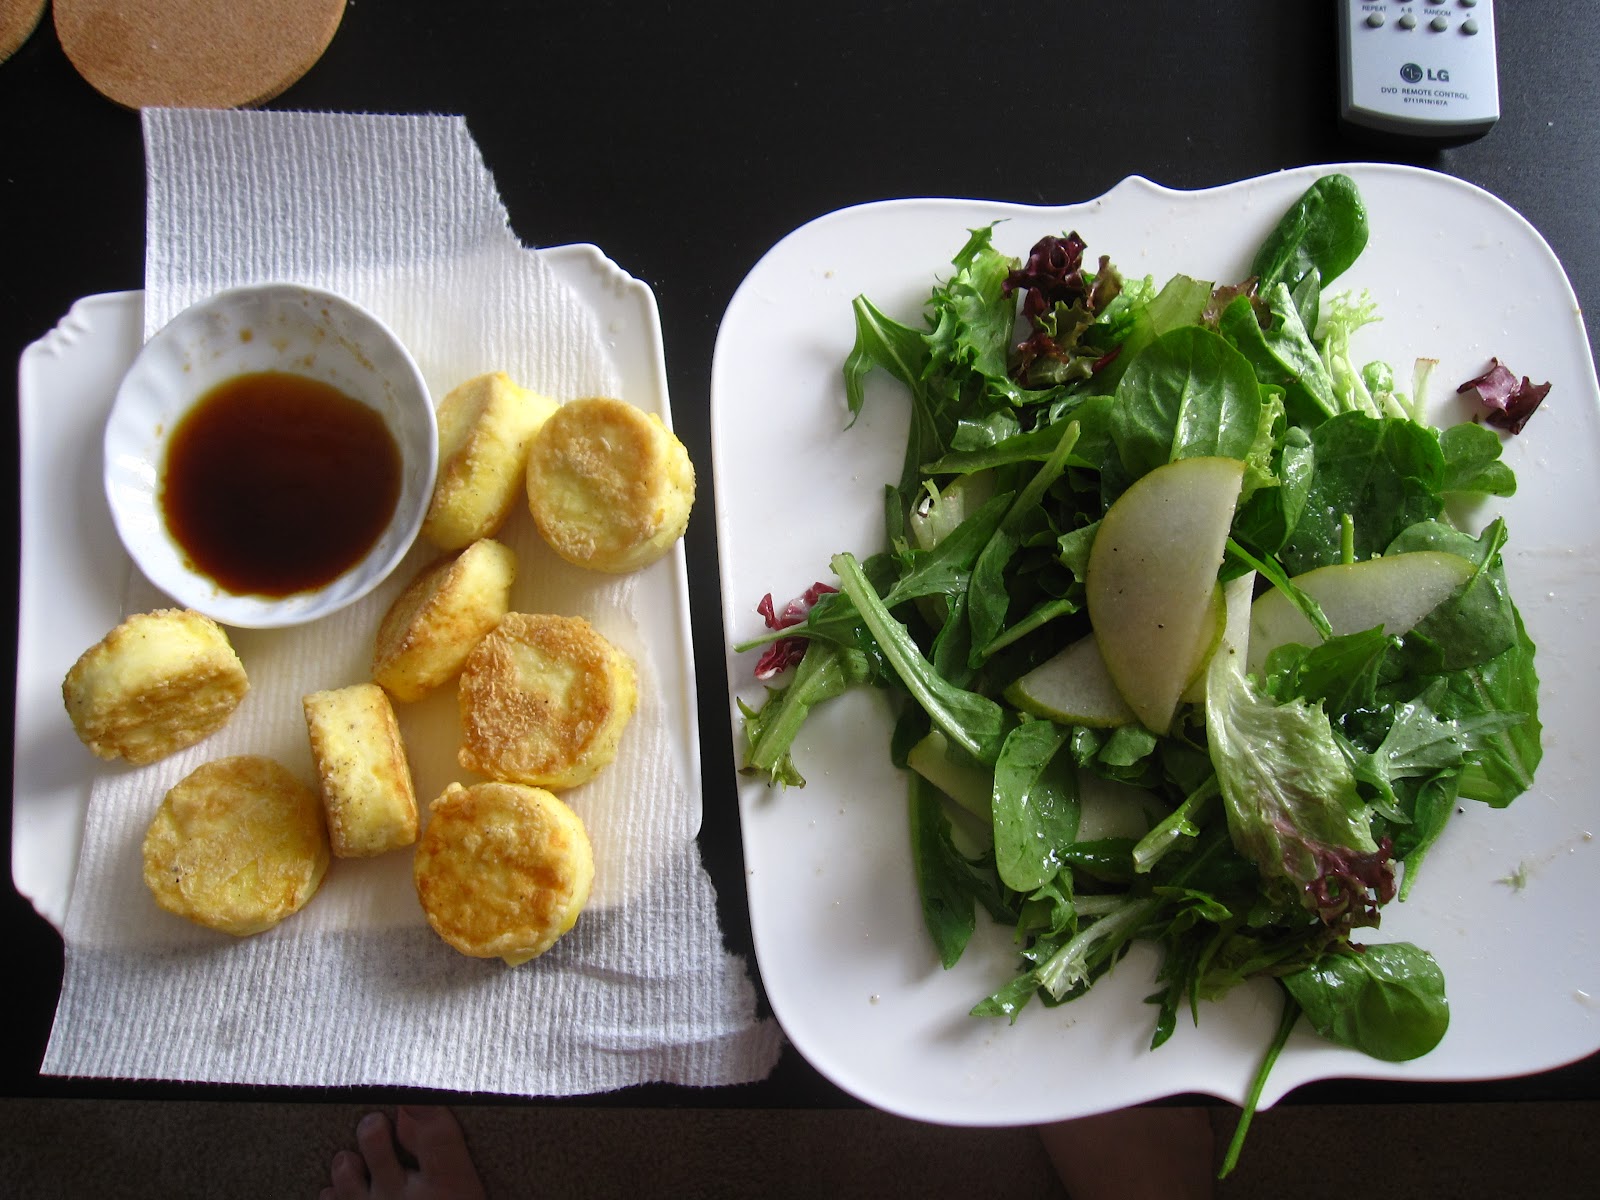 |
| Crispy fried egg tofu, mixed greens in a garlic dressing topped with sliced pears |
 |
| Vegetarian yakisoba! |
Sunday, April 22, 2012
Meatless Salad
Believe it or not, this is the first salad I've made as a part of my Meatless Month!
I was a vegetarian over a decade (*sigh*) ago when I was in my last years of high school and into University. I ate so much salad that when I went back to my carnivore ways, I declared that I had eaten enough salad for a lifetime. And I still stick by that declaration! Sure, I indulge and have a salad every once in a while but they are full-on, jam packed salads that would make a foodie proud. I was just so sick of your plain lettuce-tomato-cucumber salad that seem to appear in every restaurant and dorm cafeteria buffet.
This salad contains no lettuce. Well...actually it sits on a bed of lettuce, but the actual heart of the salad is a mixture of veggies that include:
What I love about making salads is that it's very much free form. You can't have "too much" of a certain vegetables. Love avocado? Go crazy! Love tomatoes? Knock yourself out! There's no...imbalance of ingredients. Sure, you may want to adjust your dressing (if needed) a bit but generally you decide how the rules go as you go along.
I was a vegetarian over a decade (*sigh*) ago when I was in my last years of high school and into University. I ate so much salad that when I went back to my carnivore ways, I declared that I had eaten enough salad for a lifetime. And I still stick by that declaration! Sure, I indulge and have a salad every once in a while but they are full-on, jam packed salads that would make a foodie proud. I was just so sick of your plain lettuce-tomato-cucumber salad that seem to appear in every restaurant and dorm cafeteria buffet.
This salad contains no lettuce. Well...actually it sits on a bed of lettuce, but the actual heart of the salad is a mixture of veggies that include:
- chickpeas
- avocado
- pepper
- tomato
- cucumber
What I love about making salads is that it's very much free form. You can't have "too much" of a certain vegetables. Love avocado? Go crazy! Love tomatoes? Knock yourself out! There's no...imbalance of ingredients. Sure, you may want to adjust your dressing (if needed) a bit but generally you decide how the rules go as you go along.
 |
| Nom nom nom |
Monday, April 16, 2012
Meatless Eating Out
As much as I eat at home, I do eat out a lot. I think I've definitely exceeded my 'seafood twice a week' rule, it just seems impossible to get a decent meatless meal in a restaurant. I'm finding that doing a menu scan of prospective menus certainly plays a big part in my venue choices. Do they have a decent selection of meat-free choices? Do they have enough vegetarian dishes/sides to combine to make a meal? A lot of the time, I do not want a plate of pasta with mushrooms and tomatoes dotting the top - can I have something more substantial? Evidently not.
I went to a restaurant recently where I opted for the pound of mussels because I simply was not going to pay $20 for penne with mushrooms. Or eat a 'dinner' of edamame and a side Caesar.
I made the poor (but still fun) decision of visiting a smokehouse with a couple of friends to check out their offerings. The smell of smoked meat hit me like a ton of bricks as soon as I stepped out of my car. How was I going to survive this lunch? Would they have anything remotely acceptable for me to eat? Luckily the smokehouse is a shared commissary with other vendors, so at least I knew I would be able to eat desserts.
The charcuterie board made my heart sing with happiness yet my stomach cry with sorrow. I wouldn't be able to sample any of these tantalizing goods, and the extensive selection of sausage and meat rolls did nothing to allay my fears. I scanned the deli selections and noticed that they had two sad salads available, certainly not filling enough for lunch fare. I had to opt with seafood again and go with the halibut hand pie, which was delicious. I was disappointed there was no vegetable-filled pie or even a cheese-filled alternative. As a meat-eater I was thrilled at the selections, but as a temporary vegetarian I was disappointed.
I lamented to my lunchmates that I was having a difficult time finding a "substantial vegetarian meal out" and one of them sagely suggested that I go for ethnic. I had been going out for Japanese frequently but I realized that I had ignored a whole other world of vegetarian options. Paneer, anyone? Eggplant and chickpea stew? FALAFEL??!!!
Stay tuned!
I went to a restaurant recently where I opted for the pound of mussels because I simply was not going to pay $20 for penne with mushrooms. Or eat a 'dinner' of edamame and a side Caesar.
I made the poor (but still fun) decision of visiting a smokehouse with a couple of friends to check out their offerings. The smell of smoked meat hit me like a ton of bricks as soon as I stepped out of my car. How was I going to survive this lunch? Would they have anything remotely acceptable for me to eat? Luckily the smokehouse is a shared commissary with other vendors, so at least I knew I would be able to eat desserts.
The charcuterie board made my heart sing with happiness yet my stomach cry with sorrow. I wouldn't be able to sample any of these tantalizing goods, and the extensive selection of sausage and meat rolls did nothing to allay my fears. I scanned the deli selections and noticed that they had two sad salads available, certainly not filling enough for lunch fare. I had to opt with seafood again and go with the halibut hand pie, which was delicious. I was disappointed there was no vegetable-filled pie or even a cheese-filled alternative. As a meat-eater I was thrilled at the selections, but as a temporary vegetarian I was disappointed.
I lamented to my lunchmates that I was having a difficult time finding a "substantial vegetarian meal out" and one of them sagely suggested that I go for ethnic. I had been going out for Japanese frequently but I realized that I had ignored a whole other world of vegetarian options. Paneer, anyone? Eggplant and chickpea stew? FALAFEL??!!!
Stay tuned!
Thursday, April 12, 2012
Meatless Breakfast
Breakfast has to be one of my favourite meals (along with lunch and dinner, hehe) - I could easily eat 'breakfast foods' all day, and I have! Sometimes I will genuinely feel like oatmeal for dinner, or eggs for lunch. It's also a 'meal type' that is fairly generous to vegetarians, and even more so if you are eating eggs like me.

I was having a craving for pancakes, so I asked my boyfriend to make me breakfast. A full breakfast!

I actually made the pancake batter (thanks Joy of Cooking!) and added walnuts in for an extra crunch. He cooked them while I made us coffee. He wanted other breakfast goods as well so he prepared hashbrowns and eggs (and maple bacon for him) as well. I added the pineapple as a tropical garnish!
Certainly a good way to start the day!
Monday, April 9, 2012
Meatless Recovery Meal
One of the things I continue to struggle with is trying to replenish and recover my body after a tough workout at the gym. Apparently it's suggested that you intake a 4:1 carbohydrate to protein mix, but it's also proportionate to how much you weigh and how hard you work, so it's a tricky thing to calculate. I've always had a hard time trying to take in protein so going meatless for a month was a concern for me. One option for me was to drink protein shakes but buying a giant tub of powder wasn't that appealing to me.
So what's a vegetarian to do?
What about a spicy tofu and avocado salad and a tropical fruit platter?
Sounds awesome.

Spicy tofu and avocado salad = mix up a dressing of soy, sesame oil, and chili sauce. I wanted to add some natural peanut butter but I didn't have the foresight to warm it up to loosen up the texture.
So what's a vegetarian to do?
What about a spicy tofu and avocado salad and a tropical fruit platter?
Sounds awesome.

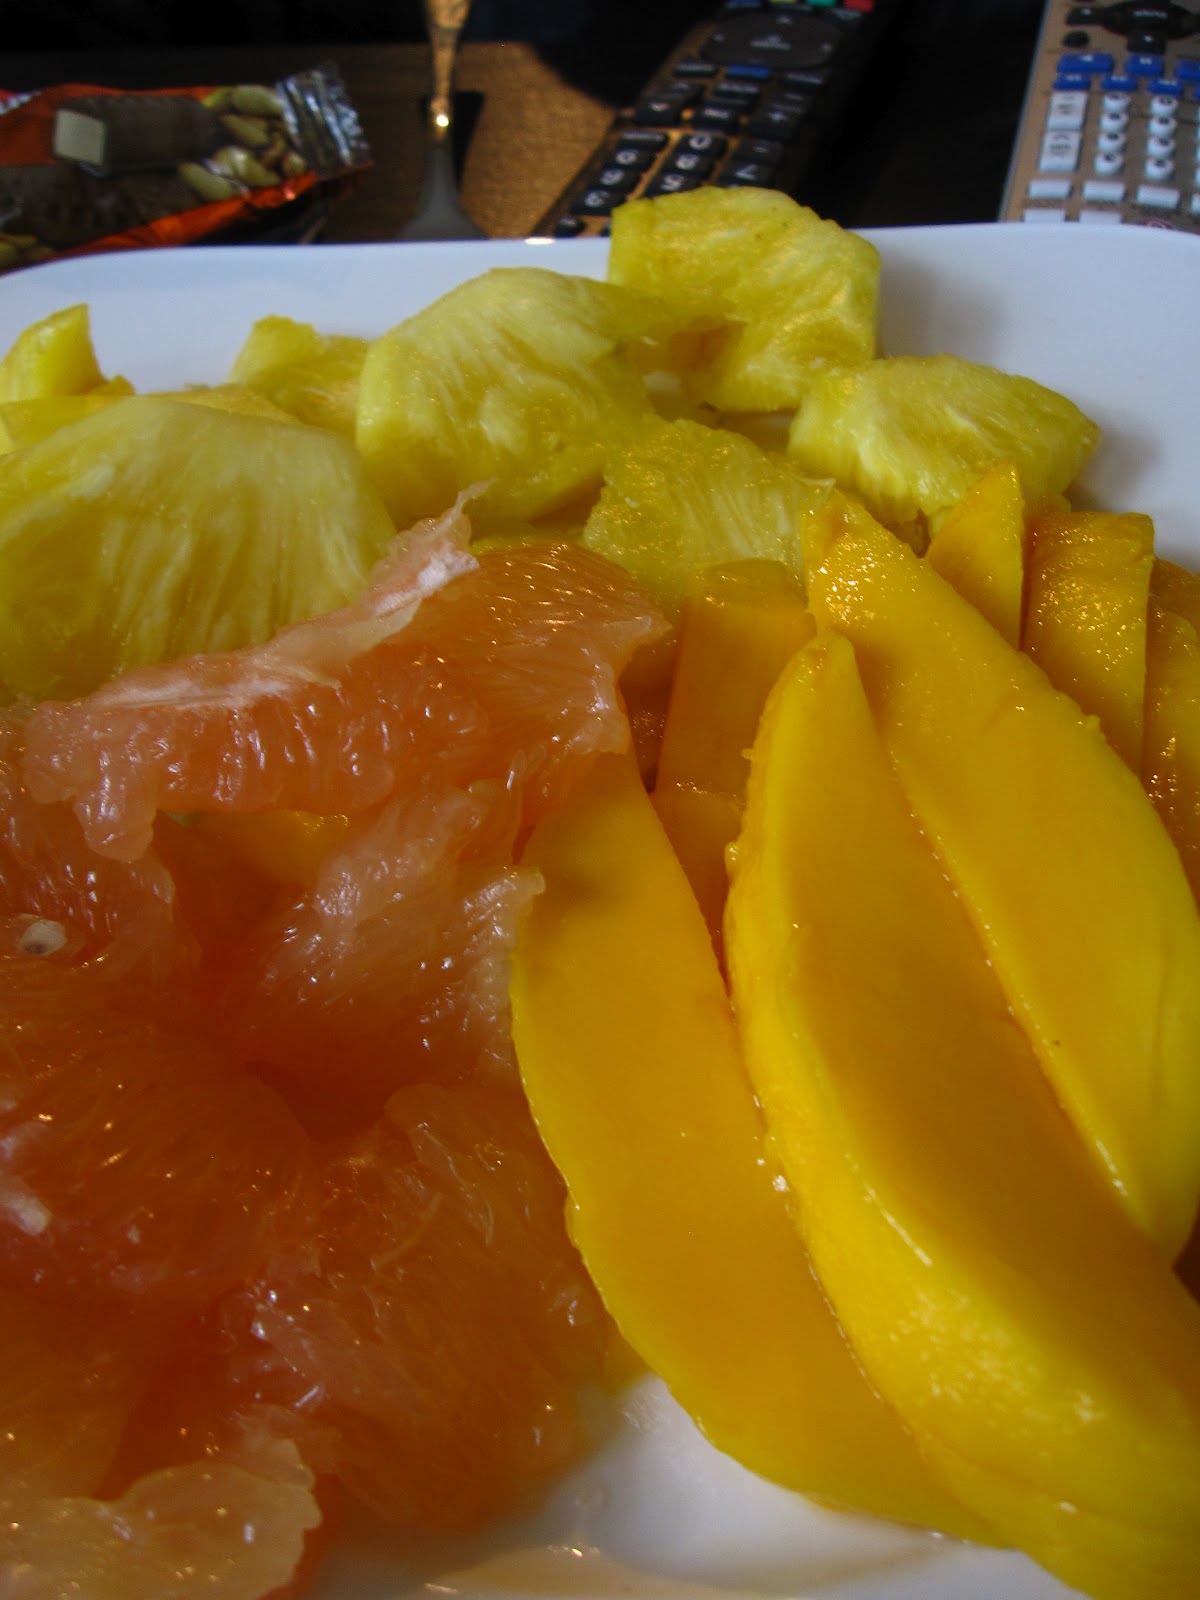 |
| Pink grapefruit, pineapple, and mango |
Spicy tofu and avocado salad = mix up a dressing of soy, sesame oil, and chili sauce. I wanted to add some natural peanut butter but I didn't have the foresight to warm it up to loosen up the texture.
Wednesday, April 4, 2012
Meatless Mexican
One of my favourite cuisines has to be Mexican food. Let's be honest, I try to be authentic but I use cheddar cheese which immediately renders it "Tex Mex". I make these breakfast or lunch burritos that I freeze and keep in neat foil packages, ready for it's 3.5 minute ride in my microwave. I can't tell you how many times a frozen burrito has saved me - during busy times at work, I would grab a couple (a breakfast and a lunch version) for meals on the go. They're hearty, flavourful, and nutritious.
This was probably the first thing I was thinking of when creating a vegetarian version. Usually the burrito would consist of: tomato-based rice pilaf, spiced meat, black beans, cheese, salsa. A breakfast version would be: steamed potatoes, scrambled eggs, beans, salsa, and cheese. It would be easy enough to omit the meat and just have a rice and beans burrito but I wanted to create a kind of meat substitute where I could still enjoy the substantial texture of a 'mock meat'.
One of my favourite restaurants in Vancouver is La Taqueria, who do authentic tacos using locally sourced ingredients. A staple on my colourful plastic plate is their roasted chili and creamed corn taco - an amazing balance of sweet, spicy and creamy goodness. I decided to do a twist on this and make a creamed corn filling.
As the rice was cooking away (it was brown rice, so it took a looooong time) I made the corn filling:

I blackened a jalapeno and sauteed it in some butter, then added about two cups of corn. I cooked that for a few minutes then added about 3/4 cup of milk to reduce and thicken. I didn't use cream (didn't have any) and the mixture didn't thicken quite as well as I had hoped, so I added about 1/2 tsp of cornstarch. It did come together nicely but it still lacked...something. And that something? Cheese! Glorious cheese!
Next up? A taco-spiced potato hash! A friend of mine warned me that a potato hash would take a long time to cook. And it did. Probably about 30 minutes? Three moderate sized potatoes, cubed, sauteing themselves in oil for about half an hour. But it turned out way better than expected. Crispy on the outside, soft on the inside! I kept the heat on medium-medium high and turned them every few minutes. I sprinkled about 1/4 package of taco seasoning to coat and toss in the last few minutes.
The rice was still not done. So it looked like I would have a rice-less plate tonight - which I didn't mind as everything else was awesome. I opened up a can of black beans, washed, drained and strained and tossed it into a small saucepan with about 1/3 cup of water.I let it cook for a bit and mashed the heck out of it. Usually for salads I keep the beans whole, but mashed black beans in a burrito 'holds' a little bit better and acts as a glue for the rice, haha.
My finished plate:
(with a scoop of salsa and a sprinkle of cheese)

Meatless Month has gotten off to a good start!
This was probably the first thing I was thinking of when creating a vegetarian version. Usually the burrito would consist of: tomato-based rice pilaf, spiced meat, black beans, cheese, salsa. A breakfast version would be: steamed potatoes, scrambled eggs, beans, salsa, and cheese. It would be easy enough to omit the meat and just have a rice and beans burrito but I wanted to create a kind of meat substitute where I could still enjoy the substantial texture of a 'mock meat'.
One of my favourite restaurants in Vancouver is La Taqueria, who do authentic tacos using locally sourced ingredients. A staple on my colourful plastic plate is their roasted chili and creamed corn taco - an amazing balance of sweet, spicy and creamy goodness. I decided to do a twist on this and make a creamed corn filling.
As the rice was cooking away (it was brown rice, so it took a looooong time) I made the corn filling:

I blackened a jalapeno and sauteed it in some butter, then added about two cups of corn. I cooked that for a few minutes then added about 3/4 cup of milk to reduce and thicken. I didn't use cream (didn't have any) and the mixture didn't thicken quite as well as I had hoped, so I added about 1/2 tsp of cornstarch. It did come together nicely but it still lacked...something. And that something? Cheese! Glorious cheese!
 |
| Oh hellz yeah. |
 |
| Awesome colour on these taters! |
My finished plate:
(with a scoop of salsa and a sprinkle of cheese)

Meatless Month has gotten off to a good start!
Monday, April 2, 2012
Meatless April
At the beginning of the year, I wanted to try a month of meat-free eating.
At a time where there would be lots of fresh vegetables, but before the BBQ season started.
April, it was decided, would be the month.
So here I am, blogging about my meatless month!
Rules:
Unfortunately today was the "wedding recovery day" so I had a frozen macaroni & cheese and going for sushi tonight. Tomorrow I'll share my shopping list and some menu ideas.
At a time where there would be lots of fresh vegetables, but before the BBQ season started.
April, it was decided, would be the month.
So here I am, blogging about my meatless month!
Rules:
- Eggs allowed
- Dairy allowed
- Fish allowed twice a week (if eating out and vegetarian options are limited)
- "Picking off" allowed (ie. eating pizza if I've picked off the meat, I'm not going to be all, "but the chicken was ON the pizza" about it)
- Broths, bases and fats allowed but in moderation
Unfortunately today was the "wedding recovery day" so I had a frozen macaroni & cheese and going for sushi tonight. Tomorrow I'll share my shopping list and some menu ideas.
Sunday, March 4, 2012


Saturday, February 25, 2012
An Upgraded Take
While my family was in town, we went to one of our restaurant mainstays - The Keg. Although I am an adventurous eater and come from a family that has roots in the restaurant industry, my parents are fairly conservative when it comes to food. My brother is game to try new things, but doesn't cook. When I go out to eat with my parents we go to one of four or five restaurants that have been tried, tested, and true. They know what to order and what to expect and don't really stray from the list. The Keg is the default "fancy" place of the list where they can get a good steak. Ironically a few years ago my dad wasn't eating beef, I was a vegetarian and my mom was on a big seafood kick - yet we still went to The Keg!
Anyway, they had a set menu special that my mom had which included the Billy Miner Pie. It's basically a 4" high mocha ice cream pie on a chocolate crumb crust, topped with caramel sauce and almonds. It's generally a crowd pleaser, and yes, it's good! A couple of friends of mine love this dessert and as I was going to see them, I decided to do my own take on the Billy Miner Pie.
Let's break it down by component:

The ice cream
Their ice cream was veeeeery fluffy (almost whipped) with a mild taste. I did a normal churned ice cream amped with chocolate and espresso powder which yielded a rich, smooth, and dense product. As you can see from the picture, I didn't get quite the height as the original but I'd sacrifice a bit of size for quality.
The crust
As for the crust, it seemed that the original had chocolate crumb packed onto the bottom and side of the slice. It was powdery and didn't have any solid support structure at all. I stuck with a chocolate crust, mixing boxed crumb with ground up toasted hazelnuts with melted butter and sugar. I pressed it into a tart pan and baked it for about 15 minutes. It was definitely more like a tart crust, but the nuts in the crumb added a great dimension to the flavour.
The sauce
Their was a basic caramel sauce. Probably from a bottle. I made a fudge sauce of which the base was a salted caramel sauce to which I added a generous handful of dark chocolate. Yeah. It was awesome. Thick. Gloppy. Not too sweet.
The almonds
Same for both. I could've toasted mine I suppose....
All in all - I think my version was pretty darn good. But let's all admit, we have weaknesses for things that are not quite as fussed over (mine is McCain's Deep & Delicious Cake).
Anyway, they had a set menu special that my mom had which included the Billy Miner Pie. It's basically a 4" high mocha ice cream pie on a chocolate crumb crust, topped with caramel sauce and almonds. It's generally a crowd pleaser, and yes, it's good! A couple of friends of mine love this dessert and as I was going to see them, I decided to do my own take on the Billy Miner Pie.
Let's break it down by component:
- Mocha ice cream
- Chocolate crumb crust
- Caramel sauce
- Almonds

The ice cream
Their ice cream was veeeeery fluffy (almost whipped) with a mild taste. I did a normal churned ice cream amped with chocolate and espresso powder which yielded a rich, smooth, and dense product. As you can see from the picture, I didn't get quite the height as the original but I'd sacrifice a bit of size for quality.
The crust
As for the crust, it seemed that the original had chocolate crumb packed onto the bottom and side of the slice. It was powdery and didn't have any solid support structure at all. I stuck with a chocolate crust, mixing boxed crumb with ground up toasted hazelnuts with melted butter and sugar. I pressed it into a tart pan and baked it for about 15 minutes. It was definitely more like a tart crust, but the nuts in the crumb added a great dimension to the flavour.
The sauce
Their was a basic caramel sauce. Probably from a bottle. I made a fudge sauce of which the base was a salted caramel sauce to which I added a generous handful of dark chocolate. Yeah. It was awesome. Thick. Gloppy. Not too sweet.
The almonds
Same for both. I could've toasted mine I suppose....
All in all - I think my version was pretty darn good. But let's all admit, we have weaknesses for things that are not quite as fussed over (mine is McCain's Deep & Delicious Cake).
Tuesday, February 14, 2012
The Sandwich of Dreams!
I hosted a dinner for a date recently. I slow cooked a beef shank and served it on polenta with sauteed mushrooms. One of the parts of the meal I was looking forward to was the juicy (and giant) marrow of the beef bone. Like a bulleye, it stared me down whenever I opened up the lid of the slow cooker. I couldn't wait to plunge a knife into the centre and scoop out that velvety marrow and spread it on a piece of toasted baguette. Hell, I would have passed on the rest of the dinner for 10 minutes alone with that marrow bone. Alas, I had to share, but I did get two generously slathered baguette slices along with the rest of my dinner.
A couple of days later, I got to revisit the dinner...in the Sandwich of Dreams!
I took the leftover baguette and cut it in half and lightly toasted it. I heated up some of the beef, shredded it and put it on the bread. The cherry on top? Slices of brie. Oh yeah. And yes, I had a bowl of au jus for dipping as well. (oh, and a baked yam with a dollop of yogurt)

A couple of days later, I got to revisit the dinner...in the Sandwich of Dreams!
I took the leftover baguette and cut it in half and lightly toasted it. I heated up some of the beef, shredded it and put it on the bread. The cherry on top? Slices of brie. Oh yeah. And yes, I had a bowl of au jus for dipping as well. (oh, and a baked yam with a dollop of yogurt)

Monday, January 30, 2012
One Cake - Three Ways
Ok, so a little late to the party, but I'm back!
I have some big news to break - but that's another post for another day.
The first birthday cake of the year snuck up on me and I only had a few days to pull it together. I have always wanted to make a confetti cake, which is basically a plain white cake flecked with sprinkles! How delightful! I've seen them in boxed cake form and I thought I would take a stab at it. Why not ring in the first 2012 birthday cake with a festive confetti cake?
I cobbled together a cake (no recipe, ma!) and dumped in a jar of sprinkles.
Here's the thing. I think there is a trick to confetti cake because the sprinkles essentially melted and instead of flecks of colour in the cake...I got blobs. It was pretty... "festive" looking. Delicious, but certainly not what I had expected. I poured the batter into a tube pan (ring-shaped pan) and after it was done I carved out a tunnel from the underside. I then filled the 'cake trench' with whipped cream that had been flavoured with some homemade strawberry jam. I took a thin layer of cake that I had carved out and patched up the trench, so essentially there was a tunnel of strawberry cream inside the cake. I then made a ganache and poured it on top and let it dribble down the sides.

That was the 'first' permutation of the cake.
Using the scraps of the cake, I built a small cup-sized trifle. I had a date coming over a few days later and wanted to serve this as a dessert. I layered the cream, cake, toasted hazelnuts, and ganache in a whiskey tumbler and added some slivered almonds as a garnish.

That was the 'second' permutation of the cake.
And for the third?
The rest of the scraps (plus some ganache added later) that I devoured after cleaning up!

Goes to show that one cake, can certainly go a long way.
I have some big news to break - but that's another post for another day.
The first birthday cake of the year snuck up on me and I only had a few days to pull it together. I have always wanted to make a confetti cake, which is basically a plain white cake flecked with sprinkles! How delightful! I've seen them in boxed cake form and I thought I would take a stab at it. Why not ring in the first 2012 birthday cake with a festive confetti cake?
I cobbled together a cake (no recipe, ma!) and dumped in a jar of sprinkles.
Here's the thing. I think there is a trick to confetti cake because the sprinkles essentially melted and instead of flecks of colour in the cake...I got blobs. It was pretty... "festive" looking. Delicious, but certainly not what I had expected. I poured the batter into a tube pan (ring-shaped pan) and after it was done I carved out a tunnel from the underside. I then filled the 'cake trench' with whipped cream that had been flavoured with some homemade strawberry jam. I took a thin layer of cake that I had carved out and patched up the trench, so essentially there was a tunnel of strawberry cream inside the cake. I then made a ganache and poured it on top and let it dribble down the sides.

That was the 'first' permutation of the cake.
Using the scraps of the cake, I built a small cup-sized trifle. I had a date coming over a few days later and wanted to serve this as a dessert. I layered the cream, cake, toasted hazelnuts, and ganache in a whiskey tumbler and added some slivered almonds as a garnish.

That was the 'second' permutation of the cake.
And for the third?
The rest of the scraps (plus some ganache added later) that I devoured after cleaning up!

Goes to show that one cake, can certainly go a long way.
Wednesday, January 11, 2012
Hello 2012!
Okay, okay, I know. Very bad blogger, Spoon!
The end of 2011 was a lot hairier than I expected. I wrapped up some big projects at work, had a typically busy end-of-year social life, did a whack of home renos and...to top it all of - a raging sinus infection that had me at my couch's mercy for the last two weeks of the year. So you'll have to excuse me for being extremely negligent in blogging.
I did manage to push out another cookbook - not the same concept I had started with, but I'm proud to show off some of the great work I did last year.
So what about 2012?
I set five resolutions for the year and two of them are food related. The first one was to blog at least every two weeks and discuss whatever it is that has caught my food interest. So this could be to document something I have made, but I'm hoping I will write more about food observations and memories. The second is to eat vegetarian for an entire month. I think I may make small allowances for seafood, especially if I am eating out but it will be pretty limited. My target is for April or May, as I do like to reserve my meat eating for BBQ season!
I'm thinking both of these goals can be accomplished. For the writing, it's about making time and really committing to it. For the vegetarian month, I was a veggie for a few years so I'm thinking it won't be that difficult. My goal there is to be as creative as I can with vegetarian eating, and I'll definitely be documenting it all here!
The end of 2011 was a lot hairier than I expected. I wrapped up some big projects at work, had a typically busy end-of-year social life, did a whack of home renos and...to top it all of - a raging sinus infection that had me at my couch's mercy for the last two weeks of the year. So you'll have to excuse me for being extremely negligent in blogging.
I did manage to push out another cookbook - not the same concept I had started with, but I'm proud to show off some of the great work I did last year.
So what about 2012?
I set five resolutions for the year and two of them are food related. The first one was to blog at least every two weeks and discuss whatever it is that has caught my food interest. So this could be to document something I have made, but I'm hoping I will write more about food observations and memories. The second is to eat vegetarian for an entire month. I think I may make small allowances for seafood, especially if I am eating out but it will be pretty limited. My target is for April or May, as I do like to reserve my meat eating for BBQ season!
I'm thinking both of these goals can be accomplished. For the writing, it's about making time and really committing to it. For the vegetarian month, I was a veggie for a few years so I'm thinking it won't be that difficult. My goal there is to be as creative as I can with vegetarian eating, and I'll definitely be documenting it all here!
Sunday, November 27, 2011
Occupy Kitchen!
So yes, I haven't blogged in a while. It doesn't mean that I'm not busy! I'm still cranking things out of the kitchen, but a lot of what I was making was for my Christmas project. Ironically, today, I decided to scrap the original idea and go with a more generic focus. My idea was to do a Chinese-food themed cookbook, but I realized that trying to make presentable dishes every weekend, whether or not I wanted to eat them or not, was turning into a very ambitious project. And I was losing my passion for it very quickly. I think it will be something I will put together later, but I think I need to spend more time perfecting my recipes and figuring out better lighting schemes in the darker months.
But aside from Chinese food, I am still baking away! Two big birthdays came and went - which meant two cakes were made along with some other treats cranked out from my oven.
Have you ever heard of Domo-Kun? He's this Japanese...err..."character" who is actually a mascot for a TV station. It's all a bit weird, but he's very cute and adorable and can be seen adorning many people's cell phones, key chains and other typical swag areas. A friend LOVES Domo - so why not make her a Domo cake for her big day? I've seen it done many times before (online) and as I was not going to do extremities (gah, I don't think I can find a box big enough for arms and legs) - it was a simple square chocolate cake.
I present to you... Domo-cake!


Cake: Dark Chocolate Cake (classic standby recipe, it never fails to shock me how much sugar it contains)
Filling: White Chocolate Mousse (next time will use gelatin or a proper egg-white stabilizer)
Frosting: Chocolate Buttercream
Details: Eyes - Girl Guide Chocolate Mint Thins, Mouth - White Candy Melts, red colouring
Yes, it does look like a Deep 'n Delicious cake! :P I used a fat star tip to pipe the buttercream. The cake was received very well, and was as delicious as it was cute!
But aside from Chinese food, I am still baking away! Two big birthdays came and went - which meant two cakes were made along with some other treats cranked out from my oven.
Have you ever heard of Domo-Kun? He's this Japanese...err..."character" who is actually a mascot for a TV station. It's all a bit weird, but he's very cute and adorable and can be seen adorning many people's cell phones, key chains and other typical swag areas. A friend LOVES Domo - so why not make her a Domo cake for her big day? I've seen it done many times before (online) and as I was not going to do extremities (gah, I don't think I can find a box big enough for arms and legs) - it was a simple square chocolate cake.
I present to you... Domo-cake!


Cake: Dark Chocolate Cake (classic standby recipe, it never fails to shock me how much sugar it contains)
Filling: White Chocolate Mousse (next time will use gelatin or a proper egg-white stabilizer)
Frosting: Chocolate Buttercream
Details: Eyes - Girl Guide Chocolate Mint Thins, Mouth - White Candy Melts, red colouring
Yes, it does look like a Deep 'n Delicious cake! :P I used a fat star tip to pipe the buttercream. The cake was received very well, and was as delicious as it was cute!
Monday, October 31, 2011
10 Minute Dinner
I don't usually post about my day-to-day eating. It's usually fast, tasty and not so pretty looking. I'm all about the end product, heck, I've been known to eat things straight out of the pan! That's why I generally post about my baked goods. You eat one or two (or a dozen) and then get to work photographing the rest. I can take my time angling my cookies or slices of cake 'just so'. But with dinner? No, no, no, no - I gotta eat. Now.
But I was struck by the beauty and simplicity of my dinner tonight and was inspired to capture it for all to see.
I present to you my 10 minute dinner (which proves the point that good, healthy and fast food can be had):
Creamy polenta topped with sauteed kale and a couple of fried eggs!

I started the polenta first: 1/2 cup cornmeal + 1 cup water + 1 cup milk. Bring to a boil over medium and keep stirring until thickened - this takes about 5-8 minutes or so. Add in salt, pepper and grated cheese to taste. At around the halfway point, throw your eggs on one side of a frying pan and a couple of handfuls of kale on the other side. Throw the lid on for a couple of minutes. All of it should come together around the same time.
And for economy's sake, let's do a price breakdown for tonight's dinner:
Polenta: 40 cents
Eggs: 92 cents
Kale: 50 cents
Total for dinner: $1.82 (let's round up to $2 incl extra ingredients)
Seriously! A $2 dinner!
But I was struck by the beauty and simplicity of my dinner tonight and was inspired to capture it for all to see.
I present to you my 10 minute dinner (which proves the point that good, healthy and fast food can be had):
Creamy polenta topped with sauteed kale and a couple of fried eggs!

I started the polenta first: 1/2 cup cornmeal + 1 cup water + 1 cup milk. Bring to a boil over medium and keep stirring until thickened - this takes about 5-8 minutes or so. Add in salt, pepper and grated cheese to taste. At around the halfway point, throw your eggs on one side of a frying pan and a couple of handfuls of kale on the other side. Throw the lid on for a couple of minutes. All of it should come together around the same time.
And for economy's sake, let's do a price breakdown for tonight's dinner:
Polenta: 40 cents
Eggs: 92 cents
Kale: 50 cents
Total for dinner: $1.82 (let's round up to $2 incl extra ingredients)
Seriously! A $2 dinner!
Subscribe to:
Posts (Atom)